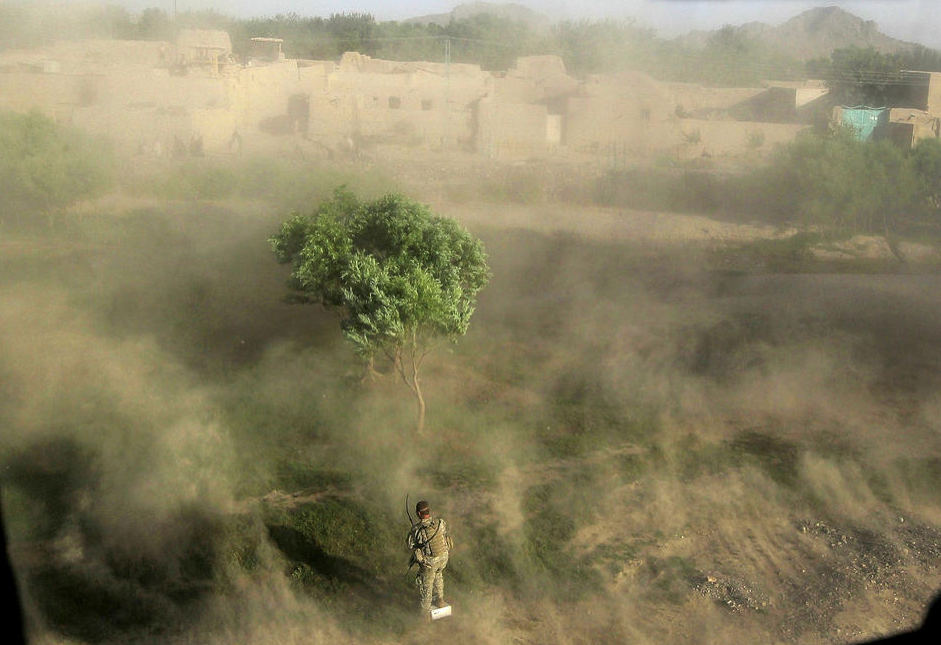
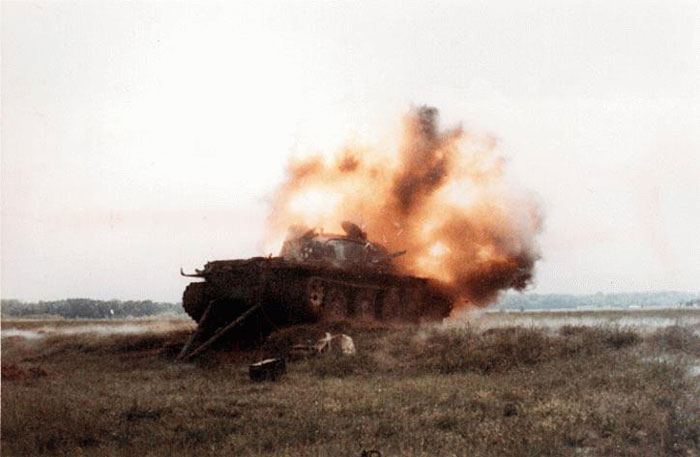
Alright, I haven´t updated this in quite a while, so it is high time to continue.
Going into playtesting means the development of major features is slowing down, so I didn´t have that many ground breaking design decisions to outline here. However, many small changes were made to fix the deficiencies we discovered during playtesting.
Showing posts with label Dev Diary. Show all posts
Sunday, June 28, 2015
Tuesday, December 16, 2014
Code Red - Dev Diary 12: List Building II
Hey folks,
I´m a few days late with the Dev Diary as I
was busy and not very motivated to write another entry last week - including the
weekend.
So today we´re covering list building with
some more in-depth details.
Let´s take a look at some entries from the
Taliban list to get a better idea how the system works.
First of all, every faction has some degree
of flavor built into it, encouraging you to use them according to their doctrine
or preferred way of fighting. Modern US Forces will get cheaper fire support,
Russians will probably get cheaper mechanized forces and artillery and so on –
always depending on the theatre of course.
The Taliban list takes a special position
here as a list that doesn´t get much of a bonus, but has a huge amount of
choices and flexibility. Taliban units are not cheap (in fact, some units might
even be more expensive than comparable units from other lists), but they have a
large arsenal that can be combined into a multitude of force compositions,
enabling clever players to use synergies and adapt their list to meet the
challenge ahead.
Before we delve deeper into the example:
The list is still work in progress and being tested, not the final
product.
The basic building block of the Taliban list
is the Cell, currently available in three sizes: Small cell (3), medium cell
(5) and large cell (7).
Each cell has options to choose from, like
adding leaders, support weapons and other shenanigans. Next to the options
there are restrictions and limits.
Small Cell
Options
+ RPK (Magazine LMG) (10pt)
+ PKM (MMG) (20pt) (not available with RPG-7)+ RPG-7 (40pt) (not available with PKM)
+ Ammo for RPG-7 (20pt)
+ Weapon Team (10pt)
+ Upgrade to Hardcore Fighters (10pt)
+ Upgrade to Foreign Fighters (21pt)
+ Leader (additional figure) (35pt) (1 per 150pt*)
+ Ambush Card (10pt) (max. 2 per Cell)
By choosing and customizing our cells we can
now create a variety of different infantry groups, ranging from standard
infantry groups over MG-teams to RPG-cells and so on.
Being a tactically advanced and versatile
irregular force, the Taliban also have options to upgrade their troops to a
higher standard by making them Hardcore Fighters or even Foreign Fighters
(Cechens, Syrians, Arabs, Pakistanis, etc.) – this doesn´t come cheap but will
boost the effectiveness of your core force. Combine this with a cheap screen of
irregulars to suck up the enemy firepower and you can devastate modern western
forces.
Taliban also have the capability to add
area denial options in the form of IEDs to their list. IEDs can have a huge
impact on battles as we experienced in several test games – Western Forces think
twice before heading into a minefield. You can (and should) combine your regular
IEDs with some dummies to increase the uncertainty, it´s a cheap option that
always pays off. And there are Suiciders carrying IEDs as
well…
The Afghan Insurgents also have access to
some limited Fire support either in direct fire mode (like DShK HMGs, RPGs and
SPGs) or indirectly via mortars and improvised, unguided rockets, which can be
combined with disguised locals to correct shots.
Speaking of locals: The Taliban list also
sports Rules of Engagements that apply to their opponents. These can be a real
pain in the ass, if your opponents troops have to confirm the hostility of their
opponents first, while you can shoot as you like. There are different sets of
RoE, from PID checks to Fire support restrictions of different intensity.
Furthermore, there are reinforcements. You
can choose from several lists and customize the kind and intensity of
reinforcements, from a trickle of Hardcore Foreign fighters to waves of locals.
As outlined in the DD on this topic, there are some trade-offs here.
Being Insurgents, the Taliban are also
masters of the ambush – so they do have access to Ambush cards, both when
setting up their list and during the game (getting new cards).
And there is another advantage of their
guerilla nature: The enemy does have some restrictions on the objectives you
will be confronted with. Some objectives are simply not available against
guerillas.
The only things Taliban do not have are
heavy fire support (large artillery and airstrikes) and heavy vehicles (not even
armed technicals, as the use of those is suicidal with all the air assets flying
around).
All in all, the Taliban have multitude of
options that are not available to other combatants per se – this is their
inherent bonus: flexibility and the ability to adapt.
You can create any kind of scenario. Small
number local insurgents in urban environments imposing heavy Rules of Engagement
on their opponent, Human Wave Tactics with lots of reinforcements (beware your
command dice though!), Hardcore Foreign Fighters fighting in a remote area using
all sorts of ugly tricks, IED-ridden environments becoming the showground of an
ambush, and so on…
I hope this adds some more insights into the list building, please leave your questions in the comment section if there are any.
Cheers
BG
Sunday, December 7, 2014
Code Red - Dev Diary 11: List Building
Hello again,
I´ve been struggling with myself if I should write another DD today or not. I haven´t had much time this week and progress has been slow. But I decided I can´t break the schedule that easily, so this one will be a shorty.
We´re moving on to the scenario generator. My vision has already been outlined in one of the very early conceptual DDs. I want to design a system that combines the best aspects of point based gaming and scenarios.
The point-based system is very well suited to pick-up games, each player brings along his list, you set up the table and just go and play. I feel like this aspect is very popular with many gamers and certainly an mechanism that most of the "big" gaming systems out there have in common.
What people don´t like about this approach and why scenarios are so popular is that you´ll almost never see the kind of balanced engagements that standard point systems produce in reality, so they´ll always feel rather artificial. More often than not, one side has an inherent advantage over the other, either more material, better equipment or training, etc.
As outlined earlier, I can´t imagine any good reason why these two aspects can´t be combined into a single game mechanism. Scenarios are usually balanced by giving the inferior side easier objectives or by restrictions to the superior side (like rules of engagement and such).
Why can´t we give these point values as well?
This is the basic idea we used for list building. A list contains troops, support, objectives, circumstances, etc., all valued with a certain point value. As with your usual Warhammer, FoG- or Battlegroup-game, you set up your list by combining these in any fashion allowed by the restrictions of the list until you hit your scenario point value.
Now two people can bring along their list and a scenario is born. The trick is that you will chose the objective for your opponent when building your list, so you cannot min-max your list according to YOUR objective (as this one will be set by your opponent). It also means that objectives that are more difficult to fulfil for your opponent will be more expensive, so you will have less troops available to defend it and reach your own objective.
The exact details and balancing the system are still work in progress, the basic idea so far seems to work. It´s a daunting task to get all the tiny details right, especially regarding the objectives - things can go wrong from time to time and we have to test more thoroughly to erase all the glitches that can be set up with this system, but I´m confident that given enough time we can work out a good and solid framework for people to design their own scenarios as a standard game.
More details next week, I hope you are not too disappointed with this rather shallow entry :/
I´ve been struggling with myself if I should write another DD today or not. I haven´t had much time this week and progress has been slow. But I decided I can´t break the schedule that easily, so this one will be a shorty.
We´re moving on to the scenario generator. My vision has already been outlined in one of the very early conceptual DDs. I want to design a system that combines the best aspects of point based gaming and scenarios.
The point-based system is very well suited to pick-up games, each player brings along his list, you set up the table and just go and play. I feel like this aspect is very popular with many gamers and certainly an mechanism that most of the "big" gaming systems out there have in common.
What people don´t like about this approach and why scenarios are so popular is that you´ll almost never see the kind of balanced engagements that standard point systems produce in reality, so they´ll always feel rather artificial. More often than not, one side has an inherent advantage over the other, either more material, better equipment or training, etc.
As outlined earlier, I can´t imagine any good reason why these two aspects can´t be combined into a single game mechanism. Scenarios are usually balanced by giving the inferior side easier objectives or by restrictions to the superior side (like rules of engagement and such).
Why can´t we give these point values as well?
This is the basic idea we used for list building. A list contains troops, support, objectives, circumstances, etc., all valued with a certain point value. As with your usual Warhammer, FoG- or Battlegroup-game, you set up your list by combining these in any fashion allowed by the restrictions of the list until you hit your scenario point value.
Now two people can bring along their list and a scenario is born. The trick is that you will chose the objective for your opponent when building your list, so you cannot min-max your list according to YOUR objective (as this one will be set by your opponent). It also means that objectives that are more difficult to fulfil for your opponent will be more expensive, so you will have less troops available to defend it and reach your own objective.
The exact details and balancing the system are still work in progress, the basic idea so far seems to work. It´s a daunting task to get all the tiny details right, especially regarding the objectives - things can go wrong from time to time and we have to test more thoroughly to erase all the glitches that can be set up with this system, but I´m confident that given enough time we can work out a good and solid framework for people to design their own scenarios as a standard game.
More details next week, I hope you are not too disappointed with this rather shallow entry :/
Sunday, November 30, 2014
Code Red - Dev Diary 10: Reinforcements
Hello guys and welcome back to the tenth week since we started this Dev Diary series. To be honest, I´ve fallen a little behind on my planned schedule regarding the first playable test version since we have some more changes that need internal testing and I probably won´t be able to host a playtesting session throughout december, so the end of the dev diary will probably not coincide with the start of the Betatesting as I had originally planned.
So I´m talking about some minor aspects now instead of going full-steam with the scenario generator as I had intended. We´re saving this for later.
Today it´s all about reinforcements. Reinforcements are troops that are not in your initial deployment and will enter the table during the game. We added some new ideas and concepts here, but again we´ll have to take a look at Force on Force to understand how we got where we are now.
FoF used a reinforcement- or insurgency-level to roll against at the beginning of each turn, so you´d get a variable number of reinforcements depending on your luck. When you got them you´d roll on a table to determine which troops would enter the board and roll again to see which "Hot Spot" they would deploy from. These Hotspots where 5 points on the table carrying numbers, you roll a D6 and deploy on the rolled number, with a 6 meaning you get to choose one.
With the introduction of the Command and Control mechanics we realised that bringing on reinforcements on a random basis could actually destabilise the game a little, especially when people got lucky and deployed a lot of leaders as reinforcements. Furthermore, the reworked defense mechanics meant that troops would survive longer than they used to, so the need to deploy reinforcements declined somewhat while the impact of new troops arriving was larger (as you need more time to grind them down)
So we felt that a new measure of control had to be introduced to stop the flow of new recruits onto the battlefield. Instead of simply reducing the overall number, we did this by introducing an element of choice and a trade-off.
Instead of rolling automatically at the beginning of each turn, reinforcements can be called by your leaders, so they will require an order. This action will cost a command die (see also Dev Diary 3) and will be an order that you won´t have available to activate your troops.
This way, we´re giving the Insurgent player full control over their reinforcements. He can call whenever he likes, as long as he has dice left. Of course, there is a downside of coordinating a lot of forces coming onto the battlefield, so each attempt after the first will incur an increasing penalty on your roll. So you are actually more efficient when constantly bringing in small amounts of troops, but you probably won´t be able to do that all the time due to the limited budget of command dice.
Furthermore, we changed the way the reinforcement tables worked. Instead of scenario specific tables, we have a few predefined tables for each faction that can be upgraded in various ways. For the Taliban, there are currently 4 or 5 tables to choose from, containing a variety of forces from Local Taliban to Foreign Fighters and IEDs. You can mix and match these in your list and, as I said, upgrade them in various ways, so you have a lot of room to customise your own reinforcement pool.
During the game, you can roll on any of the tables you "bought", so you can bring in Local Taliban with one command die, add Foreign Fighters to your troops with a second one and try to get an IED in the next turn with new command dice.
Depending on your upgrade, the chances to succeed are increasing - the basic table has quite a substential rate of failure, so mixing different types of reinforcements is either costly if you want high efficiency (high rates of success per throw) or a little less efficient compared to specialising on one or two reinforcement-table upgraded to higher tiers.
We have also discarded Hotspots, on the one hand because we feel that while they were quite fun in FoF they left the Blufor player with too much certainty over where troops could pop up and which areas where clear. Second, we had introduced the Ambush Cards (explained in Dev Diary 9) and had a good way of bringing "hidden" troops onto the table already, so we felt the Hotspots where a little redundant.
Troops are thus either entering through ambush cards (hidden sleeper cells that are "activated" by the call of their leader, grab their weapons and get out of hiding) or enter on the table edges outside Blufors deployment zone and outside of 10" of blufor troops (troops flocking in from areas outside the actual battlefield).
This has worked rather well so far and we haven´t missed the Hotspots much.
Of course this also adds the challenge of how to set up your leaders to coordinate the inflow of new recruits. Just having them sit on the edge of the battlefield is no good after all, so bringing in a lot of troops might seem like a good thing, but unless you can place them right into Line of Sight with your opponent they will strain your command resources if they don´t bring along their own leader.
During our testing sessions, these changes have spiced up the reinforcements aspect a lot by transforming them from a random mechanism to a mechanic influenced (and influencing) player decision.
That´s about it for today.
Cheers
BG
So I´m talking about some minor aspects now instead of going full-steam with the scenario generator as I had intended. We´re saving this for later.
Today it´s all about reinforcements. Reinforcements are troops that are not in your initial deployment and will enter the table during the game. We added some new ideas and concepts here, but again we´ll have to take a look at Force on Force to understand how we got where we are now.
FoF used a reinforcement- or insurgency-level to roll against at the beginning of each turn, so you´d get a variable number of reinforcements depending on your luck. When you got them you´d roll on a table to determine which troops would enter the board and roll again to see which "Hot Spot" they would deploy from. These Hotspots where 5 points on the table carrying numbers, you roll a D6 and deploy on the rolled number, with a 6 meaning you get to choose one.
With the introduction of the Command and Control mechanics we realised that bringing on reinforcements on a random basis could actually destabilise the game a little, especially when people got lucky and deployed a lot of leaders as reinforcements. Furthermore, the reworked defense mechanics meant that troops would survive longer than they used to, so the need to deploy reinforcements declined somewhat while the impact of new troops arriving was larger (as you need more time to grind them down)
So we felt that a new measure of control had to be introduced to stop the flow of new recruits onto the battlefield. Instead of simply reducing the overall number, we did this by introducing an element of choice and a trade-off.
Instead of rolling automatically at the beginning of each turn, reinforcements can be called by your leaders, so they will require an order. This action will cost a command die (see also Dev Diary 3) and will be an order that you won´t have available to activate your troops.
This way, we´re giving the Insurgent player full control over their reinforcements. He can call whenever he likes, as long as he has dice left. Of course, there is a downside of coordinating a lot of forces coming onto the battlefield, so each attempt after the first will incur an increasing penalty on your roll. So you are actually more efficient when constantly bringing in small amounts of troops, but you probably won´t be able to do that all the time due to the limited budget of command dice.
Furthermore, we changed the way the reinforcement tables worked. Instead of scenario specific tables, we have a few predefined tables for each faction that can be upgraded in various ways. For the Taliban, there are currently 4 or 5 tables to choose from, containing a variety of forces from Local Taliban to Foreign Fighters and IEDs. You can mix and match these in your list and, as I said, upgrade them in various ways, so you have a lot of room to customise your own reinforcement pool.
During the game, you can roll on any of the tables you "bought", so you can bring in Local Taliban with one command die, add Foreign Fighters to your troops with a second one and try to get an IED in the next turn with new command dice.
Depending on your upgrade, the chances to succeed are increasing - the basic table has quite a substential rate of failure, so mixing different types of reinforcements is either costly if you want high efficiency (high rates of success per throw) or a little less efficient compared to specialising on one or two reinforcement-table upgraded to higher tiers.
We have also discarded Hotspots, on the one hand because we feel that while they were quite fun in FoF they left the Blufor player with too much certainty over where troops could pop up and which areas where clear. Second, we had introduced the Ambush Cards (explained in Dev Diary 9) and had a good way of bringing "hidden" troops onto the table already, so we felt the Hotspots where a little redundant.
Troops are thus either entering through ambush cards (hidden sleeper cells that are "activated" by the call of their leader, grab their weapons and get out of hiding) or enter on the table edges outside Blufors deployment zone and outside of 10" of blufor troops (troops flocking in from areas outside the actual battlefield).
This has worked rather well so far and we haven´t missed the Hotspots much.
Of course this also adds the challenge of how to set up your leaders to coordinate the inflow of new recruits. Just having them sit on the edge of the battlefield is no good after all, so bringing in a lot of troops might seem like a good thing, but unless you can place them right into Line of Sight with your opponent they will strain your command resources if they don´t bring along their own leader.
During our testing sessions, these changes have spiced up the reinforcements aspect a lot by transforming them from a random mechanism to a mechanic influenced (and influencing) player decision.
That´s about it for today.
Cheers
BG
Sunday, November 23, 2014
Code Red - Dev Diary 9 - Fog of War
And another sunday afternoon, so time for the next dev diary
(though I´m obviously pre-writing it at an earlier time ;))
Today we´re going to talk about different mechanics of Fog of War. The chaotic, unpredictable nature of the battlefield.
For Code Red, we´re going for a layered approach to depict this difficult part. The very first layer is obviously die rolling, which creates a lot of chaos through path-dependency. It´s the usual thing you´d expect in wargames - very lucky or unlucky rolls can of course cut through your plans and create a very difficult environment for planning your attack or defense.
Everybody knows how that works, and we had some pretty incredible cases in our playtests already - an LMG team got shot badly, managed to save all 4 attacks without morale effects, shot back, scord 5 successes and the attacker failed to save all 5 on a threshold of 4+ on a D10. Such things happen, they are unpredictable and part of the Fog of War.
Though obviously that´s not a valid game mechanic. So looking at what else is adding uncertainty and special events in our game, we´re on to the second layer: Fog of War Cards (or event cards).
Anyone who played Code Reds "ancestor" Force on Force will know these played a role. During our first few games of FoF we completely ditched these cards as they screwed the balance of the scenario with Tanks popping up, Special Forces joining one side, sandstorms hitting every second game... the idea was fun, but the effect seemed a little over the top to me to b enjoyable.
So we transformed the Fog of War cards by designing a new set of effects which is constantly expanded. Instead of huge balance-disturbing events we now have a set of effects that happen on a much lower level but may influence the outcome of the game in a much more subtle (but substential) way. Instead of tanks popping up you´ll now see the Machineguns jamming or running low on ammo, cover crumbling under enemy fire, and generally cards giving all sorts boni or mali to rolls depicting the mishaps and extraordinary performances you might find on the battlefield.
To add a twist to this card-scheme, you may now hold the cards and play them at any moment of your choice - so there´s a question of prioritising your effects, do you keep them for a critical situation or play them outright? If you keep them until the end of the game, you might use them to hasten the demise of your enemy by investing them to end the game earlier than it might otherwise (which we´ll talk about in one of the future Diaries covering Scenario Generation).
Now on to a third layer of Fog of War, Ambushes. I´ve though about simlpe ways how to depict the deployment of units that are hidden to the ambushed faction and came up with a mechanic using Ambush Cards.
These cards provide a set of limiting factors (terrain features and map parts) which allow you to redeploy troops on the table or bring in new reinforcements (depending on the card) to the areas outlined by the cards.
So if you hold an Ambush Card saying "Redeploy a unit to a building or wall on the eastern half of the map" you may exactly do this if you play the card. Only restriction is that you may not pop up in the immediaty surrounding of your enemy in close contact, you´ll always have to stay outside 10". And of course you may not remove a unit within enemy line of sight to redeploy it.
Any command die used to activate a unit that has just been deployed or redeployed using an ambush card will trigger an "ambush", granting the ambushing units some one-off bonuses on their rolls during the turn. If you just have them stick around, they might be spotted and will not gain any bonuses in future turns, but might still roll good enough to surprise their prey.
This mechanism allows us to depict guerilla style warfare pretty well - usually there´s one faction able to mount an ambush, usually the local guerillas, the defenders, etc. - while the other faction is pretty well observed and will rarely be able to surprise their opponent.
So holding an ambush card equals a threat from every terrain piece on the board, you don´t know what your opponents restrictions are, the ambush might happen anywhere, but there´s a clear restriction written on the card - as soon as you play the card to execute it, your opponent can see whats going on and verify the legitimate use of the card.
And of course your opponent might hold cards that are utter trash because the tabletop does not have the required terrain features on the right part of the board... but you won´t know!
Last but not least we have the fourght layer of Fog of War, which is the use of dummies for IEDs, pre-planned artillery strikes and things like that. You know from your opponents list that there might be an IED somewhere, but not exactly where. You might figure it out eventually, but he could have messed with your psyche and placed it somewhere else... he might even use an ambush card to relocate an IED to a better place, but you have no idea if that was a real IED or just a dummy to screw with you...?
So while dummies are nice, they will not be used in a widespread manner to obscure the placement of your units - just the important bits, where it would be pointless to know EXACTLY were bad things are going to happen so you can avoid them easily.
That´s the most important points about Fog of War and the unforeseen events that you might encounter. Until next sunday!
(though I´m obviously pre-writing it at an earlier time ;))
Today we´re going to talk about different mechanics of Fog of War. The chaotic, unpredictable nature of the battlefield.
| Fog of War - Image source: nocaptionneeded.com |
For Code Red, we´re going for a layered approach to depict this difficult part. The very first layer is obviously die rolling, which creates a lot of chaos through path-dependency. It´s the usual thing you´d expect in wargames - very lucky or unlucky rolls can of course cut through your plans and create a very difficult environment for planning your attack or defense.
Everybody knows how that works, and we had some pretty incredible cases in our playtests already - an LMG team got shot badly, managed to save all 4 attacks without morale effects, shot back, scord 5 successes and the attacker failed to save all 5 on a threshold of 4+ on a D10. Such things happen, they are unpredictable and part of the Fog of War.
Though obviously that´s not a valid game mechanic. So looking at what else is adding uncertainty and special events in our game, we´re on to the second layer: Fog of War Cards (or event cards).
Anyone who played Code Reds "ancestor" Force on Force will know these played a role. During our first few games of FoF we completely ditched these cards as they screwed the balance of the scenario with Tanks popping up, Special Forces joining one side, sandstorms hitting every second game... the idea was fun, but the effect seemed a little over the top to me to b enjoyable.
So we transformed the Fog of War cards by designing a new set of effects which is constantly expanded. Instead of huge balance-disturbing events we now have a set of effects that happen on a much lower level but may influence the outcome of the game in a much more subtle (but substential) way. Instead of tanks popping up you´ll now see the Machineguns jamming or running low on ammo, cover crumbling under enemy fire, and generally cards giving all sorts boni or mali to rolls depicting the mishaps and extraordinary performances you might find on the battlefield.
To add a twist to this card-scheme, you may now hold the cards and play them at any moment of your choice - so there´s a question of prioritising your effects, do you keep them for a critical situation or play them outright? If you keep them until the end of the game, you might use them to hasten the demise of your enemy by investing them to end the game earlier than it might otherwise (which we´ll talk about in one of the future Diaries covering Scenario Generation).
Now on to a third layer of Fog of War, Ambushes. I´ve though about simlpe ways how to depict the deployment of units that are hidden to the ambushed faction and came up with a mechanic using Ambush Cards.
These cards provide a set of limiting factors (terrain features and map parts) which allow you to redeploy troops on the table or bring in new reinforcements (depending on the card) to the areas outlined by the cards.
So if you hold an Ambush Card saying "Redeploy a unit to a building or wall on the eastern half of the map" you may exactly do this if you play the card. Only restriction is that you may not pop up in the immediaty surrounding of your enemy in close contact, you´ll always have to stay outside 10". And of course you may not remove a unit within enemy line of sight to redeploy it.
Any command die used to activate a unit that has just been deployed or redeployed using an ambush card will trigger an "ambush", granting the ambushing units some one-off bonuses on their rolls during the turn. If you just have them stick around, they might be spotted and will not gain any bonuses in future turns, but might still roll good enough to surprise their prey.
This mechanism allows us to depict guerilla style warfare pretty well - usually there´s one faction able to mount an ambush, usually the local guerillas, the defenders, etc. - while the other faction is pretty well observed and will rarely be able to surprise their opponent.
So holding an ambush card equals a threat from every terrain piece on the board, you don´t know what your opponents restrictions are, the ambush might happen anywhere, but there´s a clear restriction written on the card - as soon as you play the card to execute it, your opponent can see whats going on and verify the legitimate use of the card.
And of course your opponent might hold cards that are utter trash because the tabletop does not have the required terrain features on the right part of the board... but you won´t know!
Last but not least we have the fourght layer of Fog of War, which is the use of dummies for IEDs, pre-planned artillery strikes and things like that. You know from your opponents list that there might be an IED somewhere, but not exactly where. You might figure it out eventually, but he could have messed with your psyche and placed it somewhere else... he might even use an ambush card to relocate an IED to a better place, but you have no idea if that was a real IED or just a dummy to screw with you...?
So while dummies are nice, they will not be used in a widespread manner to obscure the placement of your units - just the important bits, where it would be pointless to know EXACTLY were bad things are going to happen so you can avoid them easily.
That´s the most important points about Fog of War and the unforeseen events that you might encounter. Until next sunday!
Sunday, November 16, 2014
Code Red - Dev Diary 8: Vehicle Destruction
Hello again and welcome to another iteration of our dev diary series!
Todays topic is Vehicle Destruction.
The reason why I call it vehicle destruction rather than vehicle combat is simple: we´re focussing on destructio, as that´s the major area of change and the most important field to talk about.
In Force on Force, vehicles where destroyed by rolling firepower pool, pairing off successes against the defenders defense pool which was defined be the vehicle armor. If the attacker scored more successes than failures, he could roll on the damage chart and inflict some damage.
In my opinion this approach has several downsides. First problem is mixing all the relevant factors and steps into the firepower pool. As the firepower pool represents both hitting the target and achieving some terminal effect on the enemy, it can be very confusing to interpret. Weapon systems with more damage potential (i.e. higher firepower) are much more likely to "hit" something (i.e. score some amount of successful die rolls) but may not inflict much damage by doing so as the result can b canceled out. This produces a very strange picture of the events transpiring, with a lot of hits of very destructive weapons causing no effect on the vehicle.
On the other hand, it also means more destructive weapons are actually more likely to hit ANY target. Firing with a big gun on a very light target yields a very high chance of destroying it, not just because the damage potential is higher, but because its much more likely to produce enough successes on a higher number of dice (which will usually be enough to trigger damage vs. low amount or armor dice)
Small example:
A TOW with Firepower 9D8 or so is so much more likely to actually hit the target (expected amount of successes on TQ D8 = 5-6 dice or just a 0,026% chance to fail all 9 dice) than a 30mm autocannon with just 4D firepower (average: 2-3 dice, chance to fail all dice = 2,5%).
If you just look at the chance to fail all dice you´ll notice that a factor of 100 divides these cases.
So interpretting any successes as "hits" is not only the wrong interpretation, it´s also a problematic game design aspect. If anything, shouldn´t the 30mm cannon be much more likely to hit a target? Less likely to penetrate it may well be, but hitting something is certainly easier with a lot of ordnance flying towards the target, which the autocannon can certainly do better...
Part of that problem is remedied by the different weapon damage and vehicle armor classifications, but it still plays a strong role.
Second problem with the FoF-approach is damage resolution. FoF features many tables with effects of different guns vs. vehicle types (which is another problematic aspect but I´ll not discuss this in full length...) but ultimately yields a stochastic result. We´ve seen Abrams shooting a T55 and the T55 survived unscathed because the Abrams rolled a 1 on his D12. Several times in a row...
You can never argue about luck or bad luck, but maybe the distribution is not ideal if my chances to escape certain death by a high end tank is still almost 50%? Only a 6+ on the relevant damage table results in immediate destruction of the tank, everything below that will only damage components...
Anyway, I won´t go into too much detail here as FoF vehicle combat has so much subtleties and hidden pitfalls that make it hard to explain my point. In my opinion, the results feel wrong, and while in theory the mechanics should work and some measures have been taken to balance out the worst anomalies, the empirical evidence from gameplay is such that I think a change is required.
So what have we done with vehicle destruction for Code Red?
First of all, we´re split the process up again. You first have to hit the target, if you do so, you have to penetrate the armor. This immedialy reduces the amount of trouble caused by different weapon systems and their characteristics.
The to-hit roll is resolved like any other fire from heavy weapons and a rather trivial check. If you fail to hit your explosive charge might land elsewhere and cause damage in the area around your original target, depending on how bad your shot was.
Once you´ve hit, it´s all about penetration. In my opinion that I generated by some basic research penetration relatively close to an all-or-nothing thing. Either the vehicle is penetrated and some degree of damage is caused (with exponential effects as the level of penetration increases - minor penetration might just be survivable, major penetration will almost always kill the crew or the electronic systems and render the vehicle entirely inoperable) - or it isn´t.
To check if a vehicle is penetrated, the attacker substracts the armor value from the penetration value (AT-power of the weapon). The result is a modifier that depends entirely on armor and penetration.
This modifier is then used to roll on a damage table, added on top of 2D10 (negative modifiers are thus substracted)
2D10 generate a nice bell-curve thingy with average results of 10 and 11 respectively. Serious damage happens at 14+. Assuming equal penetration and armor, the attacker thus has about 30% chance to knock out the target with a single hit. If the penetration exceeds armor, this might very well be much higher.
There´s also a very simple solution for critical hits, which is again kept secret to encourage you to look at the full ruleset once finished ;)
If a vehicle is hit and survives the damage, the crew must take a morale check - again, this check is modified by the modifier calculated earlier, so very small calibre weapons are very unlikely to scare the crew of a heavy tank, while something potentially dangerous might make them think twice!
Of course, things are always best explained by an example. So let´s take an extreme case of a TOW vs. T55 from start to finish.
And a second example, just to show some more variety:
Todays topic is Vehicle Destruction.
| Image source: popularairsoft.com |
In Force on Force, vehicles where destroyed by rolling firepower pool, pairing off successes against the defenders defense pool which was defined be the vehicle armor. If the attacker scored more successes than failures, he could roll on the damage chart and inflict some damage.
In my opinion this approach has several downsides. First problem is mixing all the relevant factors and steps into the firepower pool. As the firepower pool represents both hitting the target and achieving some terminal effect on the enemy, it can be very confusing to interpret. Weapon systems with more damage potential (i.e. higher firepower) are much more likely to "hit" something (i.e. score some amount of successful die rolls) but may not inflict much damage by doing so as the result can b canceled out. This produces a very strange picture of the events transpiring, with a lot of hits of very destructive weapons causing no effect on the vehicle.
On the other hand, it also means more destructive weapons are actually more likely to hit ANY target. Firing with a big gun on a very light target yields a very high chance of destroying it, not just because the damage potential is higher, but because its much more likely to produce enough successes on a higher number of dice (which will usually be enough to trigger damage vs. low amount or armor dice)
Small example:
A TOW with Firepower 9D8 or so is so much more likely to actually hit the target (expected amount of successes on TQ D8 = 5-6 dice or just a 0,026% chance to fail all 9 dice) than a 30mm autocannon with just 4D firepower (average: 2-3 dice, chance to fail all dice = 2,5%).
If you just look at the chance to fail all dice you´ll notice that a factor of 100 divides these cases.
So interpretting any successes as "hits" is not only the wrong interpretation, it´s also a problematic game design aspect. If anything, shouldn´t the 30mm cannon be much more likely to hit a target? Less likely to penetrate it may well be, but hitting something is certainly easier with a lot of ordnance flying towards the target, which the autocannon can certainly do better...
Part of that problem is remedied by the different weapon damage and vehicle armor classifications, but it still plays a strong role.
Second problem with the FoF-approach is damage resolution. FoF features many tables with effects of different guns vs. vehicle types (which is another problematic aspect but I´ll not discuss this in full length...) but ultimately yields a stochastic result. We´ve seen Abrams shooting a T55 and the T55 survived unscathed because the Abrams rolled a 1 on his D12. Several times in a row...
You can never argue about luck or bad luck, but maybe the distribution is not ideal if my chances to escape certain death by a high end tank is still almost 50%? Only a 6+ on the relevant damage table results in immediate destruction of the tank, everything below that will only damage components...
Anyway, I won´t go into too much detail here as FoF vehicle combat has so much subtleties and hidden pitfalls that make it hard to explain my point. In my opinion, the results feel wrong, and while in theory the mechanics should work and some measures have been taken to balance out the worst anomalies, the empirical evidence from gameplay is such that I think a change is required.
So what have we done with vehicle destruction for Code Red?
First of all, we´re split the process up again. You first have to hit the target, if you do so, you have to penetrate the armor. This immedialy reduces the amount of trouble caused by different weapon systems and their characteristics.
The to-hit roll is resolved like any other fire from heavy weapons and a rather trivial check. If you fail to hit your explosive charge might land elsewhere and cause damage in the area around your original target, depending on how bad your shot was.
Once you´ve hit, it´s all about penetration. In my opinion that I generated by some basic research penetration relatively close to an all-or-nothing thing. Either the vehicle is penetrated and some degree of damage is caused (with exponential effects as the level of penetration increases - minor penetration might just be survivable, major penetration will almost always kill the crew or the electronic systems and render the vehicle entirely inoperable) - or it isn´t.
To check if a vehicle is penetrated, the attacker substracts the armor value from the penetration value (AT-power of the weapon). The result is a modifier that depends entirely on armor and penetration.
This modifier is then used to roll on a damage table, added on top of 2D10 (negative modifiers are thus substracted)
2D10 generate a nice bell-curve thingy with average results of 10 and 11 respectively. Serious damage happens at 14+. Assuming equal penetration and armor, the attacker thus has about 30% chance to knock out the target with a single hit. If the penetration exceeds armor, this might very well be much higher.
There´s also a very simple solution for critical hits, which is again kept secret to encourage you to look at the full ruleset once finished ;)
If a vehicle is hit and survives the damage, the crew must take a morale check - again, this check is modified by the modifier calculated earlier, so very small calibre weapons are very unlikely to scare the crew of a heavy tank, while something potentially dangerous might make them think twice!
Of course, things are always best explained by an example. So let´s take an extreme case of a TOW vs. T55 from start to finish.
The TOW-gunner declares his activation against the T55, wins his reaction test and fires. The first shot misses the tank, but due to a bad reaction test the T55 hasn´t spotted the TOW team properly and is only able to put fire in the rough direction, to little effect.
The TOW then fires again in the next turn, this time hitting the T55.
A TOW(-I) has a Penetration of 15, whereas the T55 only features a front armor of 7.
The armor is substracted from the penetration value (15-7 = 8), which results in a total bonus of +8.
Now, 2D10 are rolled and +8 are added. We roll a 16, add the 8 and get a 24.
Cross-referencing the damage table we can quickly guess that the tank explodes in a ball of flame, with munitions cooking off and parts and debris flying all around the place.
And a second example, just to show some more variety:
A T72 fires on an M60A3 Patton, hitting it (otherwise the example would be quite pointless). With a penetration of 13 the basic T72 has slightly more penetration value than the M60 has on his front armor (10).
The total modifier is thus +3 (13-10), 2D10 are rolled for penetration. Result is an 11, which is barely enough to produce a 14 with the modifier applied. The M60 is penetrated and disabled. The crew has to take casualty checks for each member- two of the crewmen are dead, the remaining two bail out and get to cover somewhere nearby.
Sunday, November 9, 2014
Code Red - Dev Diary 7: Fire Support
As you can see, the title of todays entry has been changed, as we´re proud to announce the current working title for our modern ruleset.
Before we move on to the main aspect of this dev diary, I want to clarify a few points about reactions tests thatt have been pointed out to me.
| Air Strike - Image source: |
Before we move on to the main aspect of this dev diary, I want to clarify a few points about reactions tests thatt have been pointed out to me.
Sunday, November 2, 2014
Code Red - Dev Diary 6: Close Assault & Casualties
Back again with another Dev Diary for our modern ruleset.
This time it´s all about getting close up and gritty. We´re going to cover Close Assaults and Casualties.
The prerequisite elements (find, fix) have been covered already, so it´s time to show you how to defeat the pinned opponent once and for all... using close combat.
Close Combat in FoF was a protracted affair, with each side rolling attacks and defenses back and forth until one side broke or found itself annihilated.
While there was nothing wrong with the procedure nor the outcome, I felt that I´d have to rework it to generate a level of cohesion with the rest of the rules. As stated in earlier Dev Diaries, keeping the FoF-Mechanic of attacks and defense when it was not used anywhere else anymore didnt seem like the most straightforward solution. So I dropped it and redesigned it.
The development of the mechanism itself was one of those ideas that just appear in front of you without any thinking or planning. Sort of the "why don´t we do it that way"-moments that simply work out.
But before we get to the core, we´ll again cover what we wanted Close Assaults to be:
Defensive fire can be mounted by troops that are still able to fire, an assault would be canceled once the attacker received a morale chit during the defensive fire. Troops take a reaction test to see if the defenders are quick enough to mount effective counterfire on the assaulters, while the attacker get a penalty to their reaction test the more distance he has to cover to the target.
A small example:
A Soviet PKM-team has been pinned down by a a British Squad using the gun group to put fire on it while the rifle group maneuvered in. The British Rifle group (6 men still standing after first contact) now mount a close assault on 8" distance.
Being pinned, the PKM-team can still fire with a penalty, so they take a reaction test with the British Rifle group. The PKM-team rolls a 5, the British a 10 which means the British advance fast enough (despite all the negative modifiers) to reach the enemy position before effective fire is mounted.
Close Combat then commences, the British have 6 dice at their disposal for 6 men in combat, the Russians have 2 dice for 2 men in their team and are pinned, which penalises their roll.
Both now roll their dice and count their successes, the enemy doesn´t get a cover or defense roll at all. Unsurprisingly the British roll enough successes (two) to defeat the Russian team.
The Soviets meanwhile roll a 1 and a 7, which means they score one success after all modifiers and cause a british casualty. The British take a morale test for their casualty and roll a success, so no adverse effect for now.
After having conquered the position, they check their casualty and find him dead.
Which brings us straight to the next point: Casualties. These have been surprisingly easy on your troops when playing FoF and always seemed like a minor annoyance to deal with. To make things more realistic, we´ve increased the effects that casualties have on your troops.
Critically wounded soldiers can now succumb to their wounds on the battlefield if they are not tended to by trained medical personell. The medic is now simply there to stop that deterioration and keep your critically wounded personell alive while the combat is still going on.
Light wounds (walking wounded) that still leave the soldiers in the fight are now restricting the movement range of your troops to tactical speed and decrease combat efficiency of your unit slightly, but noticably.
Apart from buffing the wound effects we´re also using different regimes to abstract situations where the seriously wounded would be left behind to be recovered or treated after the battle - situations such as a regular conflict in a Cold War Hot environment, WW2-style situations, etc.
We also introduced a more granular effect of body armor, distinguishing between light armor (Helmets + Kevler Vests or Flakjackets) and full body armor with heavy plate carrier vests. This should allow you to depict different equipment styles throughout different periods, conflicts or factions.
We hope to introduce more options while limiting the depiction of unneccessary detail to distinguish the different features of wars and conflicts.
I think that´s it for today, more stuff coming in next week, when we´re talking about Fire Support!
This time it´s all about getting close up and gritty. We´re going to cover Close Assaults and Casualties.
The prerequisite elements (find, fix) have been covered already, so it´s time to show you how to defeat the pinned opponent once and for all... using close combat.
Close Combat in FoF was a protracted affair, with each side rolling attacks and defenses back and forth until one side broke or found itself annihilated.
While there was nothing wrong with the procedure nor the outcome, I felt that I´d have to rework it to generate a level of cohesion with the rest of the rules. As stated in earlier Dev Diaries, keeping the FoF-Mechanic of attacks and defense when it was not used anywhere else anymore didnt seem like the most straightforward solution. So I dropped it and redesigned it.
The development of the mechanism itself was one of those ideas that just appear in front of you without any thinking or planning. Sort of the "why don´t we do it that way"-moments that simply work out.
But before we get to the core, we´ll again cover what we wanted Close Assaults to be:
- Bloody. The close fight should be the real killer, while the firefight has relatively low casualty rates, the close engagements firing bursts at point blank range, using knives, bajonets, buttstocks and grenades should be very very quick and bloody.
- Defensive Fire - should play a role, as troops that are not properly suppressed have a decent chance of defeating the assault before it reaches their position.
- Morale effects - should also play a role, as troops that are suppressed are certainly less steady and aggressive than units that are fresh and calm.
Defensive fire can be mounted by troops that are still able to fire, an assault would be canceled once the attacker received a morale chit during the defensive fire. Troops take a reaction test to see if the defenders are quick enough to mount effective counterfire on the assaulters, while the attacker get a penalty to their reaction test the more distance he has to cover to the target.
A small example:
A Soviet PKM-team has been pinned down by a a British Squad using the gun group to put fire on it while the rifle group maneuvered in. The British Rifle group (6 men still standing after first contact) now mount a close assault on 8" distance.
Being pinned, the PKM-team can still fire with a penalty, so they take a reaction test with the British Rifle group. The PKM-team rolls a 5, the British a 10 which means the British advance fast enough (despite all the negative modifiers) to reach the enemy position before effective fire is mounted.
Close Combat then commences, the British have 6 dice at their disposal for 6 men in combat, the Russians have 2 dice for 2 men in their team and are pinned, which penalises their roll.
Both now roll their dice and count their successes, the enemy doesn´t get a cover or defense roll at all. Unsurprisingly the British roll enough successes (two) to defeat the Russian team.
The Soviets meanwhile roll a 1 and a 7, which means they score one success after all modifiers and cause a british casualty. The British take a morale test for their casualty and roll a success, so no adverse effect for now.
After having conquered the position, they check their casualty and find him dead.
Which brings us straight to the next point: Casualties. These have been surprisingly easy on your troops when playing FoF and always seemed like a minor annoyance to deal with. To make things more realistic, we´ve increased the effects that casualties have on your troops.
Critically wounded soldiers can now succumb to their wounds on the battlefield if they are not tended to by trained medical personell. The medic is now simply there to stop that deterioration and keep your critically wounded personell alive while the combat is still going on.
Light wounds (walking wounded) that still leave the soldiers in the fight are now restricting the movement range of your troops to tactical speed and decrease combat efficiency of your unit slightly, but noticably.
Apart from buffing the wound effects we´re also using different regimes to abstract situations where the seriously wounded would be left behind to be recovered or treated after the battle - situations such as a regular conflict in a Cold War Hot environment, WW2-style situations, etc.
We also introduced a more granular effect of body armor, distinguishing between light armor (Helmets + Kevler Vests or Flakjackets) and full body armor with heavy plate carrier vests. This should allow you to depict different equipment styles throughout different periods, conflicts or factions.
We hope to introduce more options while limiting the depiction of unneccessary detail to distinguish the different features of wars and conflicts.
I think that´s it for today, more stuff coming in next week, when we´re talking about Fire Support!
Sunday, October 26, 2014
Code Red - Dev Diary 5: Dice, Cover and Conceilment
Today we´re talking about dice.
Those of you who played Force on Force will remember the multitude of dice used to display different quality levels. The charm about that solution is that you can set a flat target number (like 4+) as a success threshold and don´t bother about modifiers for different troop quality levels or profiles with differing success numbers.
A problem I encountered after inserting my saving roll into the infantry firefight was that I suddenly had two thresholds for successes - 5+ for saves on a D10 (always a D10, no matter the troop quality) and 4+ on Troop quality dice on all other aspects.
You can probably see the problems that created - suddenly it was no longer clear which dice you should use, you had two different target numbers and no coherent ruling.
I also found that people mistook the different dies (especially D8 and D10) and grabbed the wrong ones, a problem not uncommon with players new to Force on Force.
So one day I wondered if it was worth sticking to the dice and principles inherited from FoF and came to the conclusion that I could simply switch to a single die type: my beloved D10.
| Source. clker.com |
Those of you who played Force on Force will remember the multitude of dice used to display different quality levels. The charm about that solution is that you can set a flat target number (like 4+) as a success threshold and don´t bother about modifiers for different troop quality levels or profiles with differing success numbers.
A problem I encountered after inserting my saving roll into the infantry firefight was that I suddenly had two thresholds for successes - 5+ for saves on a D10 (always a D10, no matter the troop quality) and 4+ on Troop quality dice on all other aspects.
You can probably see the problems that created - suddenly it was no longer clear which dice you should use, you had two different target numbers and no coherent ruling.
I also found that people mistook the different dies (especially D8 and D10) and grabbed the wrong ones, a problem not uncommon with players new to Force on Force.
So one day I wondered if it was worth sticking to the dice and principles inherited from FoF and came to the conclusion that I could simply switch to a single die type: my beloved D10.
Sunday, October 19, 2014
Code Red - Dev Diary 4: Infantry Firefights
In this installment of the Dev Diary series I´ll be talking about the evolution of Infantry Firefights throughout the development of the rules.
Infantry firefights have changed remarkably since I set out to design the house rules. Of course there´s been a major break away from Force on Force with the introduction of my special changes, but even compared to the Firefights of the Houserules the mechanic has changed quite a bit with additional aspects being considered (such as conceilment) while reducing the overhead procedures and simplifying the mechanics.
| Source: Wikimedia Commons |
Infantry firefights have changed remarkably since I set out to design the house rules. Of course there´s been a major break away from Force on Force with the introduction of my special changes, but even compared to the Firefights of the Houserules the mechanic has changed quite a bit with additional aspects being considered (such as conceilment) while reducing the overhead procedures and simplifying the mechanics.
Sunday, October 12, 2014
Code Red - Dev Diary 3: Command and Control
Today we´ll be going into the details of developing the Command and Control Mechanics that form the core of activating units in our new Modern Rules.
I´ve covered the reasons for designing this mechanic in Dev Diary #1, so I´ll not repeat the details here. As a reminder, I didn´t like certain aspects and had the following vision in designing the mechanic:
A lot of research and experimenting followed.
| Source: Globalsecurity.org |
I´ve covered the reasons for designing this mechanic in Dev Diary #1, so I´ll not repeat the details here. As a reminder, I didn´t like certain aspects and had the following vision in designing the mechanic:
- The number of units that can be activated per turn should be restricted to raise the question of prioritising and a decision over scarce ressources.
- Squad and Platoon Leaders should become important elements of the game
- Units operating together should be encouraged to do so on the tabletop (i.e. fireteams in the same squad operating close to each other in mutual support).
- Morale Effects of Units should restrict their ability to act or react.
A lot of research and experimenting followed.
Sunday, October 5, 2014
Code Red - Dev Diary 2: Design Philosophy
After talking about the early steps and the birth of the project I´m going to cover the design philosophy in todays update.
As I´ve outlined in the last post there were some points about Force on Force that led to the rule changes ultimately resulting in this ruleset. But being at odds with someone elses design is not enough to create a good game. Any good game needs a vision, a set of goals the system should achieve, points it has to adhere to and principles it is founded on. Modelling complex system requires you to stick to the basic aspects, identify the core principles at play and find simple ways how to
create an abstract mechanic to achieve a similar outcome...
Or more to the point: If you don´t know what you want, you´ll never get it.
| Source: Southern Utah University |
As I´ve outlined in the last post there were some points about Force on Force that led to the rule changes ultimately resulting in this ruleset. But being at odds with someone elses design is not enough to create a good game. Any good game needs a vision, a set of goals the system should achieve, points it has to adhere to and principles it is founded on. Modelling complex system requires you to stick to the basic aspects, identify the core principles at play and find simple ways how to
create an abstract mechanic to achieve a similar outcome...
Or more to the point: If you don´t know what you want, you´ll never get it.
Sunday, September 28, 2014
Code Red - Dev Diary 1: The Beginning
Alright, where do I start...
Some of you might remember that I´ve been working on a set of houserules for Force on Force a while ago after discovering some issues with how Force on Force resolves things and how that distorts the outcome of the game due to the way the game mechanic works.
After developing and testing several versions of this set of houserules I´ve come to the point where I have to take the next step forward, leaving the base system behind and free myself from the remaining restrictions - so at this point it is time to thank everyone who participated in Testing the rules and have given suitable feedback, special thanks goes to Evilrobotshane, JP Barriere, Spawnferkel, Beast44a, Zelekendel, and my local gaming club, Kurpfalz Feldherren including our guests from Frankfurt, who endured my playtesting sessions (and still do).
And of course Volker, who is actively engaged in developing the rules together with me.
But let´s go back a step and take a look at the set ouf houserules.
Some of you might remember that I´ve been working on a set of houserules for Force on Force a while ago after discovering some issues with how Force on Force resolves things and how that distorts the outcome of the game due to the way the game mechanic works.
After developing and testing several versions of this set of houserules I´ve come to the point where I have to take the next step forward, leaving the base system behind and free myself from the remaining restrictions - so at this point it is time to thank everyone who participated in Testing the rules and have given suitable feedback, special thanks goes to Evilrobotshane, JP Barriere, Spawnferkel, Beast44a, Zelekendel, and my local gaming club, Kurpfalz Feldherren including our guests from Frankfurt, who endured my playtesting sessions (and still do).
And of course Volker, who is actively engaged in developing the rules together with me.
But let´s go back a step and take a look at the set ouf houserules.
Subscribe to:
Posts (Atom)