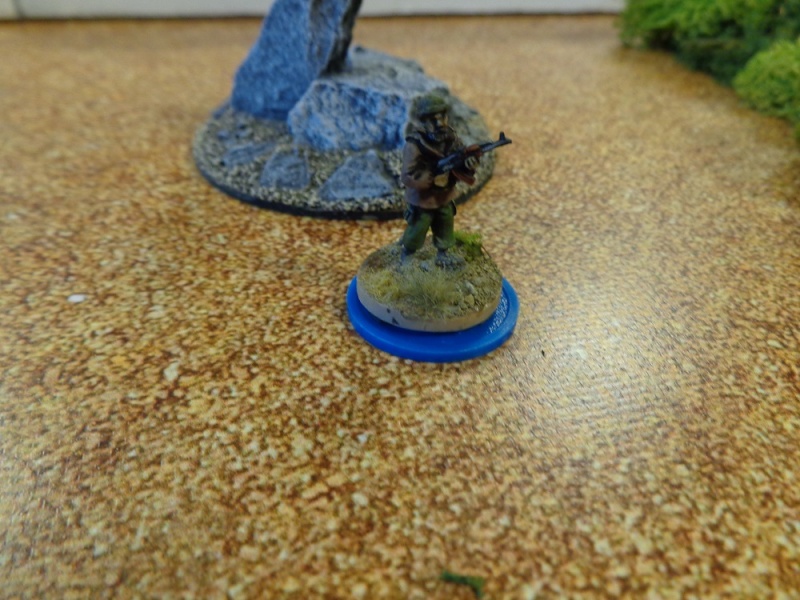
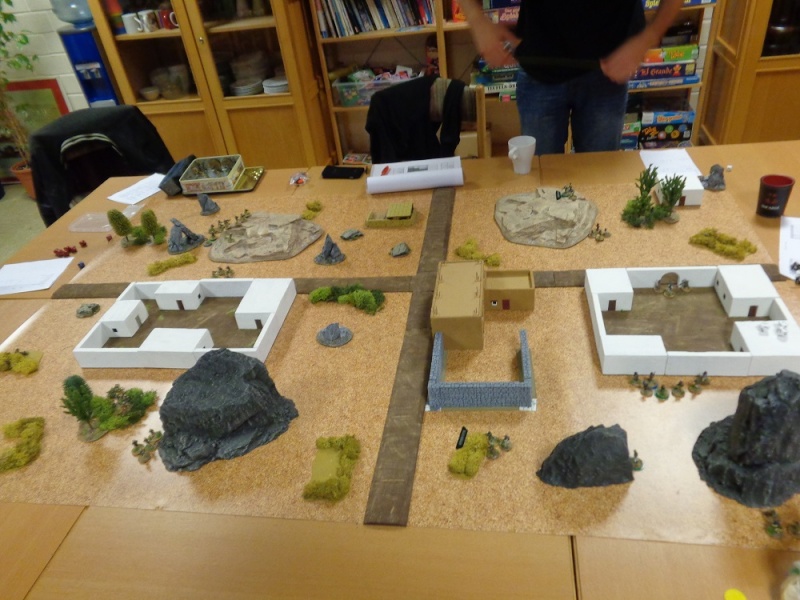
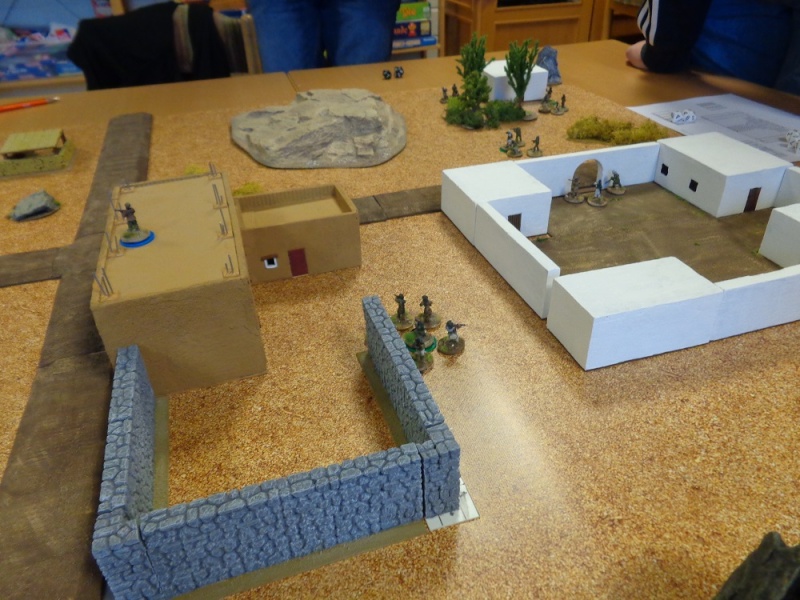
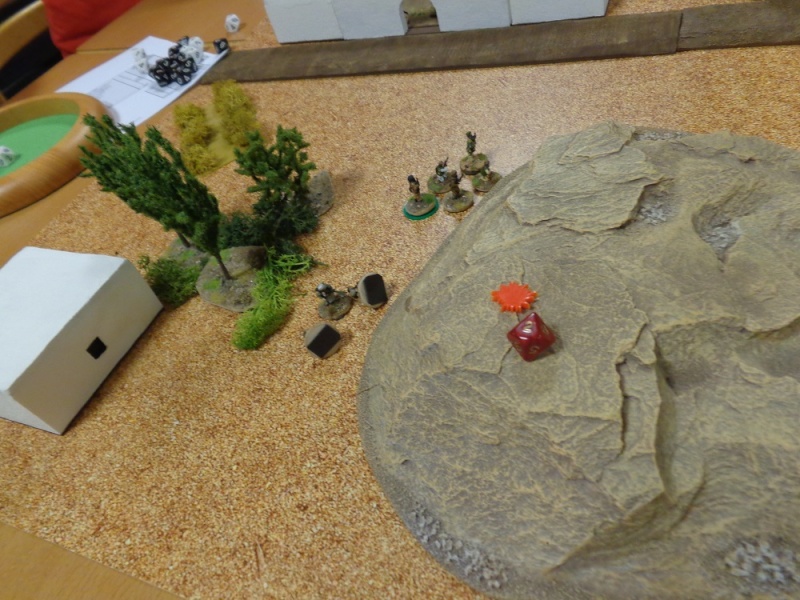
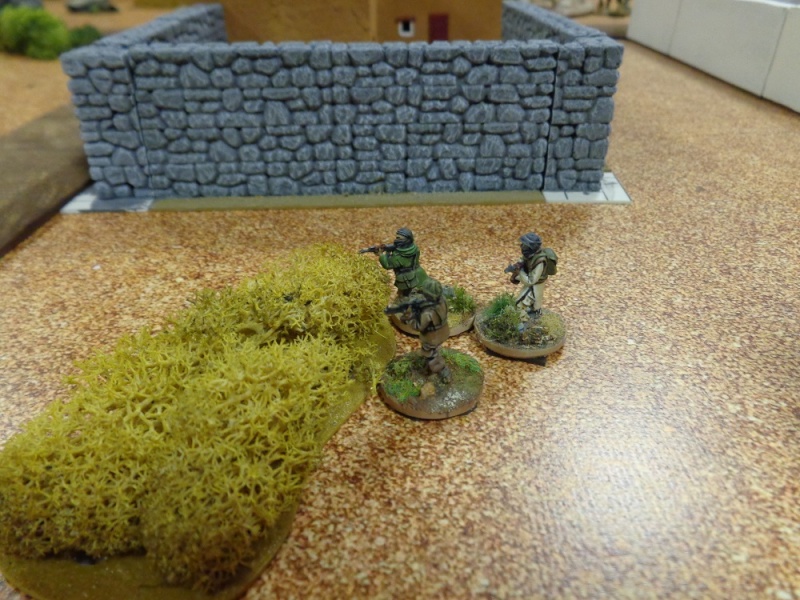
In our last game, the Opfor units suffered a resounding defeat at the hands of a US mechanized detachment suppressing and outflanking them in a forward defense position.
After this rather one-sided game, we decided to play the game in reversed roles. I would take over Opfor and have my friend attack.
I have to admit I was a bit anxious - after all, I had to prove that the forces and setup were balanced and that the shortcoming of both sides could be overcome....
Showing posts with label Battle Reports. Show all posts
Tuesday, November 28, 2017
Saturday, November 25, 2017
Code Red - Blocking Detachment (Game 1)
Last weekend we didn´t only play By Fire and Sword, but also got some playtesting done for Code Red.
This report covers the first of three playtest games. The games were quickly thrown together, without much thought about balance, dramatic scenarios or somesuch.
We threw a US Mechanized Formation against a Russian-Style Force using my Soviet Cold War models. Somewhere in the Desert, a US Intervention force was pushing along a valley to reach a strategic refinery that had to be defended by the local authorities. Let´s call our Russians OPFOR for the remainder of this report.
We wanted to test Vehicles some more, so both factions got vehicles. Unfortunately I forgot to give the Americans some spare AT weapons on their infantry squads - it turned out to be an interesting tactical challenge to work with what you got.
Labels:
20mm,
Battle Reports,
Code Red,
Russia,
USA
Wednesday, November 22, 2017
Eagle and Lion - A Fire and Sword Battle Report
In the Dark woods of the north, a duel between Lion and Eagle takes place as two scouting parties clash on their reconnaissance missions.
A Muscovite Force led by the venerable Golova Rurik Borikov makes contact with a Swedish Detachment led by Malte Larsson.
Borikov has deployed a Group of Servant Cossacks on his right flank facing Swedish Dragoons while placing his cavalry in the centre and on the left flank. The Swedish Deployment mirrors the Muscovite troop placement as both sides seek to contest the broken ground with infantry while sending their cavalry along the clearings in the forest and onto the ploughed fields.
Friday, July 21, 2017
Frozen Horsemeat - Skirmishing with the Muscovites
Last saturday I was able to attend our local wargaming day after many months of absence. As agreed before, we had mustered our forces for a Skirmish game of By Fire and Sword.
My Muscovite Skirmish force found itself in conflict with a large horde of Ukrainian Cossacks with a mix of Infantry ranging from rabble to registered molotsoi.
We fought the Foraging scenario, the stronger player (Cossacks) had to defend the loot (Frozen Horsemeat) he found in the villages against the smaller force (Muscovy). The Cossacks started the game split up between the two build up areas which enabled the muscovites to focus on one flank to even the odds.
Muscovy deployed all troops on the right flank, hoping to crush at least one half of the enemy force while their commander was on the other side of the battlefield.
Above you can see the Muscovite Servant Cossacks perparing to storm the village defended by a lot of Cossacks.
A skirmish Sotnia was sent out to block and drive off the approaching commander. Unfortunately they ended up charging the large group of cosscaks on the far edge in the flank, tempted by the opportunity, but ultimately failing.
However, they succeeded in their mission to hold off the enemy commander for a long time...
On the right flank, the battle commenced with several waves of indecisive charges of Muscovite Servant Cossacks against their free brethren in the village.
The Russian Cavalry rode close to the spearmen and let lose several volleys of close range fire.
After several failed attempts of the servant cossacks to storm the village and a long period of indecisive shooting of the horsemen against the spear-armed cossacks defending the rear of the village, a charge was ordered and the spearmen broke.
However, there was still one unit of cossacks stubbornly holding on to the village.
Just before the Muscovite Boyars and Reiter managed to crush the Cossack spearmen, their Infantry became exhausted and disorganized after several failed attempts to clear the houses.
On the left flank, the Skirmish sotnia had now charged and broke against the much larger cossack unit. The commander was free to ride to the part of the battlefield were the main action was raging and coordinated the defense.
The Russian cavalry tried twice to drive of the defenders, but without help of the infantry (still disorganized) they failed to complete their task.
In the end, after a futile attempt to disrupt the enemy foraging party, the Ukrainians got to take home the frozen horsemeat, resulting in a major victory for the Cossacks.
My Muscovite Skirmish force found itself in conflict with a large horde of Ukrainian Cossacks with a mix of Infantry ranging from rabble to registered molotsoi.
We fought the Foraging scenario, the stronger player (Cossacks) had to defend the loot (Frozen Horsemeat) he found in the villages against the smaller force (Muscovy). The Cossacks started the game split up between the two build up areas which enabled the muscovites to focus on one flank to even the odds.
Muscovy deployed all troops on the right flank, hoping to crush at least one half of the enemy force while their commander was on the other side of the battlefield.
Above you can see the Muscovite Servant Cossacks perparing to storm the village defended by a lot of Cossacks.
A skirmish Sotnia was sent out to block and drive off the approaching commander. Unfortunately they ended up charging the large group of cosscaks on the far edge in the flank, tempted by the opportunity, but ultimately failing.
However, they succeeded in their mission to hold off the enemy commander for a long time...
On the right flank, the battle commenced with several waves of indecisive charges of Muscovite Servant Cossacks against their free brethren in the village.
The Russian Cavalry rode close to the spearmen and let lose several volleys of close range fire.
After several failed attempts of the servant cossacks to storm the village and a long period of indecisive shooting of the horsemen against the spear-armed cossacks defending the rear of the village, a charge was ordered and the spearmen broke.
However, there was still one unit of cossacks stubbornly holding on to the village.
Just before the Muscovite Boyars and Reiter managed to crush the Cossack spearmen, their Infantry became exhausted and disorganized after several failed attempts to clear the houses.
On the left flank, the Skirmish sotnia had now charged and broke against the much larger cossack unit. The commander was free to ride to the part of the battlefield were the main action was raging and coordinated the defense.
The Russian cavalry tried twice to drive of the defenders, but without help of the infantry (still disorganized) they failed to complete their task.
In the end, after a futile attempt to disrupt the enemy foraging party, the Ukrainians got to take home the frozen horsemeat, resulting in a major victory for the Cossacks.
Sunday, February 28, 2016
"In the tight spot" - Part II - Code Red Ambush Scenario
After getting stuck in a vicious ambush, the battle hangs in the balance. US Forces have taken casualties and are creeping ever closer towards exceeding their threshold for defeat, but have now taken up positions to launch their counterattack in the south.
Friday, February 26, 2016
"In the tight spot" - Part I - Code Red Ambush Scenario
Last saturday I had the opportunity to set up a scenario at our monthly gaming day. As usual, I used the opportunity to playtest some aspects of the game.
This time around, my intention was to test a potential scenario setup that had hence been tested just once. The scenario was set up with the help of the scenario generation procedure I devised for the rules.
More on this might be discussed in a separate dev diary as soon as my thoughts have matured and undergone more testing.
The US force of two infantry squads in Stryker ICVs plus attached MG and command team found themselves surrounded on their patrol route through Resistobynsk, a troublesome hotspot somewhere in Eastern Europe...
This time around, my intention was to test a potential scenario setup that had hence been tested just once. The scenario was set up with the help of the scenario generation procedure I devised for the rules.
More on this might be discussed in a separate dev diary as soon as my thoughts have matured and undergone more testing.
The US force of two infantry squads in Stryker ICVs plus attached MG and command team found themselves surrounded on their patrol route through Resistobynsk, a troublesome hotspot somewhere in Eastern Europe...
Sunday, August 16, 2015
Code Red: Vietnam Playtest
In preparation for our monthly gaming day yesterday, I offered to prepare a small Code Red scenario for a skirmish set in the jungles of vietnam - and so I did, experimenting with a few aspects of scenario design that have been itching and will need to be tackled sooner or later.
So, I chose to build an imbalanced scenario, the kind of real world engagements you rarely see on the tabletop, where everything is nice and balanced.
A lightly armed, scouting US force gathering intel along the frontline was about to get hit by a full-blown assault of an armored spearhead...
Fortunately for the Americans, though not very beneficial for playtesting the game, the US Force had the sensible objective to fall back in good order, while the Vietnamese needed to push through all the way to the other side of the battlefield.
The game began with solid Command & Control for the Americans, who managed to keep the initiative throughout the entire game. Setting up along the outskirts of the village, they went into defensive positions and started to withdraw their troops, providing vital covering fire, but avoiding firefights they were sure to lose.
The Vietnamese set up their tanks dispersed evenly along the battlefield but due to their failure in utilizing the shock and surprise of their attack, they had two out of three tanks sitting in the back for the first few turns of the game. All in all, the Vietnamese commanders failed miserably to coordinate their forces.
A few minor firefights broke out on the left flank of the Americans, suppressing a lone Sniper and pinning an M60-MG Team in one of the huts.
The US infantry squad on the left zeroed in on the T55 with their M72 LAW, managed to hit, but failed to penetrate the front armor of the tank. Unimpressed, the tank returned fire and hit home with his 100mm cannon, causing chaos and upheavel among the Squad - but fortunately, no casualties.
The Squad then kept their heads down, hoping to escape another confrontation with the T55s main cannon with the help of their conceilment, calling in a Huey Heavy Hog to deal with a small group of Vietnamese Infantry in the field. Calling in the Airstrike didn´t prove as easy as imagined though as the pilot again and again failed to identify the target area.
On the left flank, a second M60 Team opened fire from a swampy ravine, trying to hit another group of infantry. Suppressing them, it didn´t took long for them to feel the Vietnamese revenge as another 100mm round struck home, killing the gunner and forcing the loader into retreat, where he was cut down while falling back.
Trying desperately to leave no man behind, the US commanders dispatched their medic to make his way into the ravine to pick up the wounded man after the M60 fell silent.
Due to good conceilment, he got there in time, found the casualty and started dragging him out... as a T55 rolled up along hit right side.
Staring with shock as the turret turned towards him, the Medic put all his strength into a final rush into the undergrowth, breaking the line of sight to the tank. Some machine gun fire cut through the leaves behind him, but he had reached safety.
The guns finally went silent as the last US units fell back from the huts and disappeared into the rice fields and jungle undergrowth, falling back to the next line of defense with better AT assets at their disposal.
They had done their job for today, jumping across razors edge with merely a single KIA and one seriously wounded casualty.
All in all, a fun game, although slighty one-sided due to the extremely good command rolls of the Americans. Hard to judge how different things might have went along if the Vietnamese dice had been better...
But, as always, I took some interesting notes that will be worked into the next version of the rules!
So, I chose to build an imbalanced scenario, the kind of real world engagements you rarely see on the tabletop, where everything is nice and balanced.
A lightly armed, scouting US force gathering intel along the frontline was about to get hit by a full-blown assault of an armored spearhead...
Fortunately for the Americans, though not very beneficial for playtesting the game, the US Force had the sensible objective to fall back in good order, while the Vietnamese needed to push through all the way to the other side of the battlefield.
The game began with solid Command & Control for the Americans, who managed to keep the initiative throughout the entire game. Setting up along the outskirts of the village, they went into defensive positions and started to withdraw their troops, providing vital covering fire, but avoiding firefights they were sure to lose.
The Vietnamese set up their tanks dispersed evenly along the battlefield but due to their failure in utilizing the shock and surprise of their attack, they had two out of three tanks sitting in the back for the first few turns of the game. All in all, the Vietnamese commanders failed miserably to coordinate their forces.
A few minor firefights broke out on the left flank of the Americans, suppressing a lone Sniper and pinning an M60-MG Team in one of the huts.
The US infantry squad on the left zeroed in on the T55 with their M72 LAW, managed to hit, but failed to penetrate the front armor of the tank. Unimpressed, the tank returned fire and hit home with his 100mm cannon, causing chaos and upheavel among the Squad - but fortunately, no casualties.
The Squad then kept their heads down, hoping to escape another confrontation with the T55s main cannon with the help of their conceilment, calling in a Huey Heavy Hog to deal with a small group of Vietnamese Infantry in the field. Calling in the Airstrike didn´t prove as easy as imagined though as the pilot again and again failed to identify the target area.
On the left flank, a second M60 Team opened fire from a swampy ravine, trying to hit another group of infantry. Suppressing them, it didn´t took long for them to feel the Vietnamese revenge as another 100mm round struck home, killing the gunner and forcing the loader into retreat, where he was cut down while falling back.
Trying desperately to leave no man behind, the US commanders dispatched their medic to make his way into the ravine to pick up the wounded man after the M60 fell silent.
Due to good conceilment, he got there in time, found the casualty and started dragging him out... as a T55 rolled up along hit right side.
Staring with shock as the turret turned towards him, the Medic put all his strength into a final rush into the undergrowth, breaking the line of sight to the tank. Some machine gun fire cut through the leaves behind him, but he had reached safety.
The guns finally went silent as the last US units fell back from the huts and disappeared into the rice fields and jungle undergrowth, falling back to the next line of defense with better AT assets at their disposal.
They had done their job for today, jumping across razors edge with merely a single KIA and one seriously wounded casualty.
All in all, a fun game, although slighty one-sided due to the extremely good command rolls of the Americans. Hard to judge how different things might have went along if the Vietnamese dice had been better...
But, as always, I took some interesting notes that will be worked into the next version of the rules!
Wednesday, April 29, 2015
More Playtesting
After a period of illness, I finally feel well enough to condense the in-game events from saturdays game into a small battle report.
I hosted a presentation of Code Red on a regional convention to get a bit more publicity. I decided to play the usual US vs. Insurgents deployment but gave the insurgents organized fighters with a solid command structure for ease of play.
Again the US Army strike force had to get in and extract important personell from the battlefield swarming with Insurgents. Their deployment included heavy support by a Bradley AFV.
The Infantry dismounted under the watchful eyes of the stryker gun crew....
At some point, an Insurgent RPG hidden in the compounds hit the Bradley up front but failed to do any damage. The crew chose to withdraw out of sight before maneuvering in once again to support the infantry in driving the Insurgents out of the building.
The infantry then started skirmishing towards the buildings....
The US commander, dissatisfied with the progress of his troops against the Insurgent RPGs, ordered a full frontal assault on the compound. Without properly suppressing the Insurgents, the Americans ran into a hail of defensive fire and were repelled in close combat.
The bloody result as the dust settled: 3 KIA.
Determined to secure victory before the Insurgents got to know the margin of their success, US forces advanced to secure the objective. They succeeded in making contact with the missing soldier but were soon flanked by a small group of Insurgents and driven off (taking the VIP with them of course)
The Insurgent leaders, finally realising their success of killing three American servicemen - bad press was certain - made contact with their superiors and got clearance to melt away from combat, leaving the field to the badly mauled American Task Force.
An Insurgent victory, mainly due to the hazardous assault on a well entrenched position that was not properly suppressed... and a shit-ton of bad luck. Assaulting can be deadly, better try outflanking the opponent next time or drive them away by sheer firepower.
I hosted a presentation of Code Red on a regional convention to get a bit more publicity. I decided to play the usual US vs. Insurgents deployment but gave the insurgents organized fighters with a solid command structure for ease of play.
Again the US Army strike force had to get in and extract important personell from the battlefield swarming with Insurgents. Their deployment included heavy support by a Bradley AFV.
The Americans deployed one squad mounted in their Stryker and advanced into the center of the battlefield to occupy key positions. The Bradley cleared the way by detonating an anti-personell IED hidden between the rock formations.
The Infantry dismounted under the watchful eyes of the stryker gun crew....
At some point, an Insurgent RPG hidden in the compounds hit the Bradley up front but failed to do any damage. The crew chose to withdraw out of sight before maneuvering in once again to support the infantry in driving the Insurgents out of the building.
The infantry then started skirmishing towards the buildings....
The US commander, dissatisfied with the progress of his troops against the Insurgent RPGs, ordered a full frontal assault on the compound. Without properly suppressing the Insurgents, the Americans ran into a hail of defensive fire and were repelled in close combat.
The bloody result as the dust settled: 3 KIA.
Determined to secure victory before the Insurgents got to know the margin of their success, US forces advanced to secure the objective. They succeeded in making contact with the missing soldier but were soon flanked by a small group of Insurgents and driven off (taking the VIP with them of course)
The Insurgent leaders, finally realising their success of killing three American servicemen - bad press was certain - made contact with their superiors and got clearance to melt away from combat, leaving the field to the badly mauled American Task Force.
An Insurgent victory, mainly due to the hazardous assault on a well entrenched position that was not properly suppressed... and a shit-ton of bad luck. Assaulting can be deadly, better try outflanking the opponent next time or drive them away by sheer firepower.
Sunday, March 22, 2015
Close Quarters Carnage - Code Red Playtest Report
Yesterday at the club I had another opportunity to playtest Code Red again. I brought to lists, US Army vs. Insurgents and after a brief explanation of the very basic rules, we went straight into a fight. My opponent was new to the game but quick to pick up the rules and proceeded very tactical without major errors, so it was a fun and balanced game.
The table we deployed had a large compound in the centre dominating the battlefield and breaking much of the line of sight, with fields and rock formations doing the rest to basically cut the table in half. The Taliban chose to deploy on the edges and designated one of the compound buildings as the US objective.
The first turn resulted in a miserable command roll for the Americans, the Insurgents were able to seize the initiative and deploy their forward formations along the treeline and close to the compound. The subsequent turns weren´t much better, the initiative only once went to the Americans before being lost again.,
The US troops used one of their Stryker ICVs to deploy their mounted infantry close to the compounds. In hindsight, it would have been better to deploy both squads with the vehicles to secure the objective and the firing lines required to defend it quickly.
After securing the first two buildings, the US struggled to bring their second squad forward without losing cohesion with their leadership. The Strykers deployed in forward positions to provide flank security. The Stryker on the left was targeted by an RPG, yet the rocket missed and the shooter got riddled with HMG bullets.
The Insurgents brought another RPG team into position, but the cell outright resisted any commands ordering them to shoot the dreaded Stryker again, fearing for their lives after whitnessing the devastating fate of their companion earlier.
Finally, the US Army secured the objective, now they had to hold onto it for several turns to secure victory. The second Stryker was redeployed to provide flank and rear security on the exposed left flank.
Small firefights erupted at the compounds, with no losses on either side, but a bit of suppression that had to be rallied.
The Insurgents moved one of their teams up slightly to contest the objective. Without Line of Sight outside of the building, there was not much the US fireteam could do to prevent that.
Strykers providing flank security while a Taliban cell maneuvers along the far side of the rock formation.
Then, the Taliban decided to launch a close assault on my separated team to drive them off the objective. Wanting to demonstrate (and test!) the bloody effects of close combat to my opponent (it was his first game and a demo) and with time running short for me anyway, I decided to hold and see what happened. I also miscalculated my odds and rolled badly...
Defensive fire felled two Insurgents, including a leader, but did not deter their assault. They went straight into a roughly equal close combat, 4 vs. 4, the US soldiers with better training, the Insurgents with better morale.
Again rolling badly, I failed to kill even a single Insurgents, while the Taliban struck down two US soldiers, forcing another morale check (again a miserable roll) and causing the unit to surrender.
Outcome: US objective no longer under control, 4 US soldiers eliminated, putting the Insurgents in a position to decide the game with a comfortable victory points margin.
They contacted their HQ, determined they had done enough damage and started to peel off, leaving the remaining Americans to clean up the mess.
Overall a very good and enjoyable game.
I´ll have to tweak the surrender mechanics a little, right now close assaults are too lopsided in favour of the attacker if they can surprise their target.
The Insurgents appeared very strong in this game, mostly due to very good command rolls and lucky dice. They did not use their reinforcements, which would have added a lot of pressure on my troops, but I didn´t call in the Mortars either and one of the strykers never saw combat...
The biggest mistake on my side as US player was to have the second squad deployed in their vehicle - you can´t beat their 20" movement to quickly seize key positions. Instead, I had one squad foot-slogging towards their positions combined with above-average initiative rolls from my opponent.
You never stop learning!
Until next time,
BG
The table we deployed had a large compound in the centre dominating the battlefield and breaking much of the line of sight, with fields and rock formations doing the rest to basically cut the table in half. The Taliban chose to deploy on the edges and designated one of the compound buildings as the US objective.
The first turn resulted in a miserable command roll for the Americans, the Insurgents were able to seize the initiative and deploy their forward formations along the treeline and close to the compound. The subsequent turns weren´t much better, the initiative only once went to the Americans before being lost again.,
The US troops used one of their Stryker ICVs to deploy their mounted infantry close to the compounds. In hindsight, it would have been better to deploy both squads with the vehicles to secure the objective and the firing lines required to defend it quickly.
After securing the first two buildings, the US struggled to bring their second squad forward without losing cohesion with their leadership. The Strykers deployed in forward positions to provide flank security. The Stryker on the left was targeted by an RPG, yet the rocket missed and the shooter got riddled with HMG bullets.
The Insurgents brought another RPG team into position, but the cell outright resisted any commands ordering them to shoot the dreaded Stryker again, fearing for their lives after whitnessing the devastating fate of their companion earlier.
Finally, the US Army secured the objective, now they had to hold onto it for several turns to secure victory. The second Stryker was redeployed to provide flank and rear security on the exposed left flank.
Small firefights erupted at the compounds, with no losses on either side, but a bit of suppression that had to be rallied.
The Insurgents moved one of their teams up slightly to contest the objective. Without Line of Sight outside of the building, there was not much the US fireteam could do to prevent that.
Strykers providing flank security while a Taliban cell maneuvers along the far side of the rock formation.
Then, the Taliban decided to launch a close assault on my separated team to drive them off the objective. Wanting to demonstrate (and test!) the bloody effects of close combat to my opponent (it was his first game and a demo) and with time running short for me anyway, I decided to hold and see what happened. I also miscalculated my odds and rolled badly...
Defensive fire felled two Insurgents, including a leader, but did not deter their assault. They went straight into a roughly equal close combat, 4 vs. 4, the US soldiers with better training, the Insurgents with better morale.
Again rolling badly, I failed to kill even a single Insurgents, while the Taliban struck down two US soldiers, forcing another morale check (again a miserable roll) and causing the unit to surrender.
Outcome: US objective no longer under control, 4 US soldiers eliminated, putting the Insurgents in a position to decide the game with a comfortable victory points margin.
They contacted their HQ, determined they had done enough damage and started to peel off, leaving the remaining Americans to clean up the mess.
Overall a very good and enjoyable game.
I´ll have to tweak the surrender mechanics a little, right now close assaults are too lopsided in favour of the attacker if they can surprise their target.
The Insurgents appeared very strong in this game, mostly due to very good command rolls and lucky dice. They did not use their reinforcements, which would have added a lot of pressure on my troops, but I didn´t call in the Mortars either and one of the strykers never saw combat...
The biggest mistake on my side as US player was to have the second squad deployed in their vehicle - you can´t beat their 20" movement to quickly seize key positions. Instead, I had one squad foot-slogging towards their positions combined with above-average initiative rolls from my opponent.
You never stop learning!
Until next time,
BG
Saturday, March 14, 2015
Code Red - Mountain Village - Part 2
While patrolling through the Mountains of Arghandab, a US army platoon spots suspicious movement along the edges of the village. The platoon commander decides to detach two squads to clear the village by seizing a compound overlooking the centre of the village to observe the potential insurgent movement, while the rest of the platoon remains behind to guard the approaches to the village.
The local insurgents, alarmed by the US troop movement in their safe area, gather for a fight. One of their senior leaders, Al Hameed ibn Sayeed, is about to be trapped in the village and must be evacuated before the US troops can make serious inroads into the village and cut of their retreat.
US troops approach through the rock formations nearby, placing a fireteam on Overwatch and quickly advancing their second team (lower right part of the picture) to secoure the first compound.
Their objective is the blue marker in the central compound by the field.
The Islamists try to make contact with their leader quickly, before the US troops can take positions dominating the open field in the centre or outmaneuver them.
Unfortunately, they are too late, the Americans are already in position.
US Troops maneuver through the woods on their right flank. The Insurgents are sending a blocking detachment to deny the Americans control of their objective.
Under the cover of their Humvee and another fireteam, the Americans conduct fire and maneuver, bringing down their fireteam from the rock formation to seize the objective compound.
However, they have to clear it of any enemy presence in the surrounding area, which will be hard given the Insurgent mob gathering in the backyard.
So far, it has been relatively silent, but the battle is about to ensue...
Suddenly, the firefight erupts as the US troops are shot at by Insurgents in the bushes ahead. Being in good cover, the Americans are only suffering morale effects while they are able to inflict minor casualties. The Islamists try to use the opportunity and make contact with their warlord.
But despite being pinned, the US troops still mean business and evaporate most of the Insurgent unit trying to make contact with their objective.
Within two turns, the rescue party is eliminated, including an Insurgent leader, which will weaken the chain of command. Fortunately for the Insurgents, they were able to call in reinforcements with a new leader prior to this disaster, so they can replace their losses.
With the threat on the left flank eliminated, the Americans send a Fireteam into the woods near the Insurgent objective, trying to block off any further advances into this direction.
Dislodging the US fireteam from this position will be hard and require some concentration of force.
Meanwhile the battle rages on on the centre, with another US fireteam arriving at the objective compound. Awful die rolling by the Islamists save the day as the Americans are again only pinned. This was a key moment, as the close range firefight could have gone the other way around....
The return fire throughout the following two turns severele reduces the Islamists strength, including another leader, who is yet again replaced by reinforcements.
On the right flank, a US fireteam is caught by surprise as a large unit of Islamists enter the compound and head into a vicious close quarters battle. Despite massive defensive fire, the Insurgents only lose two men and through a streak of luck, are able to overwhelm the US Fireteam.
Three out of for are casualties, the remaining man surrenders. The entire fireteam is lost!
Close combat is bloody!
Even with this major setback, the US forces are able to drive off the Islamists after several turns of severe firefights and another close assault on a weakened Insurgent unit. Desparate attempts to throw all available reinforcements at the US objective to prevent the capture and prolong the game can only delay the inevitable.
The Americans on the left flank have tight control over the Istlamist objective and the Insurgents find themselves unable to put enough pressure on either flank.
The large mob threatening the Fireteam in the field is finally driven off by flanking fire, breaking their morale and forcing a retreat. The objective is secured.
A US victory!
My notes on how to further improve the game:
-Casualty selection requires a clever mechanic, rolling which special figure is hit is too tedious and time consuming
-Close assaults are very bloody, un-pinned troops should have the opportunity to retreat from an assault to avoid getting ripped apart.
-a few minor things that need to be defined more clearly.
Friday, March 13, 2015
Code Red - Mountain Village - Part 1
(v.04 Playtest version)
We played an in-house test game last weekend so after months of only moderating demo-games, I finally had a chance to roll some dice myself and take the player perspective again.
We played two small forces (600pt lists) of US Army against Insurgent forces.
As US Army player, I put together a very straightforward list, selecting two Army Squads with good morale, a platoon commander with medic and a Humvee as an armored, mobile Machinegun-platform (GPMG).
As Objective for my opponent I chose "Exfiltration", which would require him to get a High Value Target out of the area to win.
The US Forces were subject to Western Medevac rules, i.e. serious casualties bleeding out if not tended to or evacuated to safe back areas.
The Islamist Insurgents selected a well-led force of local militia with a few sparse support weapons.
All in all, they had 21 men (4 leaders though) but only one RPK-LMG and one RPG.
In addition, the Islamists decided to put in Rules of Engegement, forcing my troops to take PID checks to engage unidentified enemy units. And they added reinforcements to their list, so they could call in new recruits to keep up the pressure.
The US Objective would be a "raid and secure"-objective, requiring the US troops to capture a strategic location on the map and clear it of any enemy presence to win the game.
The Insurgents were subject to rudimentary first aid, making their chances for survival very slim once they´re hit.
The table was then deployed.
Rolling for the starting zones, we ended up with the Insurgents rolling the faaaar edge of the table. As this table edge was very hard to reach (in the edge of the room, you can see the two walls...), we decided to roll again and ended up with the Islamists deploying left an the US taking the right table edge.
The edge would have been a better starting place for the Insurgents with more covered approaches and hard protection against fire. This way, the Insurgents started in a slightly more exposed location...
That´s it for now as I have to leave - I´ll be back with the rest of the report later (or tomorrow if time doesn´t permit finishing it today) - stay tuned!
We played an in-house test game last weekend so after months of only moderating demo-games, I finally had a chance to roll some dice myself and take the player perspective again.
We played two small forces (600pt lists) of US Army against Insurgent forces.
As US Army player, I put together a very straightforward list, selecting two Army Squads with good morale, a platoon commander with medic and a Humvee as an armored, mobile Machinegun-platform (GPMG).
As Objective for my opponent I chose "Exfiltration", which would require him to get a High Value Target out of the area to win.
The US Forces were subject to Western Medevac rules, i.e. serious casualties bleeding out if not tended to or evacuated to safe back areas.
![]() |
| The Humvee is missing on the picture |
The Islamist Insurgents selected a well-led force of local militia with a few sparse support weapons.
All in all, they had 21 men (4 leaders though) but only one RPK-LMG and one RPG.
In addition, the Islamists decided to put in Rules of Engegement, forcing my troops to take PID checks to engage unidentified enemy units. And they added reinforcements to their list, so they could call in new recruits to keep up the pressure.
The US Objective would be a "raid and secure"-objective, requiring the US troops to capture a strategic location on the map and clear it of any enemy presence to win the game.
The Insurgents were subject to rudimentary first aid, making their chances for survival very slim once they´re hit.
The table was then deployed.
Rolling for the starting zones, we ended up with the Insurgents rolling the faaaar edge of the table. As this table edge was very hard to reach (in the edge of the room, you can see the two walls...), we decided to roll again and ended up with the Islamists deploying left an the US taking the right table edge.
The edge would have been a better starting place for the Insurgents with more covered approaches and hard protection against fire. This way, the Insurgents started in a slightly more exposed location...
That´s it for now as I have to leave - I´ll be back with the rest of the report later (or tomorrow if time doesn´t permit finishing it today) - stay tuned!
Tuesday, November 18, 2014
The Compound - Another "Code Red" Playtest
Hello folks and welcome to the next battlereport as promised. This is the second game we played on Saturday and the setting is again Afghanistan.
I threw together two lists from previous scenarios that we hadn´t pitted against each other in this combination, so we saw the USMC facing a horde of Local, irregular Taliban.
After setting up the table and rolling off the starting edges it became pretty obvious that the terrain favoured the Taliban to some degree.
The USMC had to secure and hold the compound, the Taliban just had to kill the Infidels.
As you can see, the USMC also screwed up the initial deployment somewhat by committing a whole squad to the central compound, which severely limited their movement options. The second squad was positioned much better on the right flank, covered by a treeline and with a good look over onto the rocky hills.
The approaches to the compound where littered with suspect devices which pretty much blocked the USMCs way on any direct route into their objective.
Due to the restricted approaches the Taliban where able to secure some key positions, including the compound in the first two turns which made it even harder for the americans to achieve their objectives. Instead they switched into the patience-mode and started picking off the Insurgents at range, killing Taliban at a steady rate.
The only problem was that Taliban where getting reinforcements and could compensate this to some degree as long as key personell (leaders) were still alive.
The US couldn´t reinforce their troops and any losses would bring them one step closer to defeat. Unfortunately, the first KIA on the american side occured in the early part of the game, one of the first firefights on the right flank took down a Marine for good.
To put up more pressure, the USMC sent a Fireteam forward on the right flank to occupy the hillside under cover from the rest of the squad and called in their Cobra Gunship to deliver a strafing run on top of a bunched up group of Taliban.
Unfortunately for the Marines the Taliban were not pinned down and able to move out of the way before the ordnance hit, so the strike was actually very ineffective but at least drove the Insurgents closer to the US.
Meanwhile the Taliban had turned up with a new shiny toy, a DShK-HMG that was being set up in a field before delivering a volley of 12,7mm fire into the house occupied by US Forces. Though no casualties were caused, the Team and the JTAC where easily pinned.
To counter the threat, the Cobra was again dialed to deliver a missile into the HMG-team and the nearby cell of fighters. Unfortunately clearance procedures and a bad attack vector of th helicopter after the last strafing run delayed the request significantly and would leave the US in contact for quite a few more turns.
So instead of being stuck in the compound the Marine commander decided to relocate one of the fireteams towards the right flank to reinforce the push onto the hill.
Meanwhile the firefight on the hill and the right side in general was raging on, with one single fireteam pitted against three groups of insurgents in a firefight on close range. In a heroic stand they held out for the entire game and reduced the Taliban groups one by one - fortunately the leadership on the right flank was somewhat weakened by the loss of a leader early on, so the Taliban couldn´t fight with full efficiency as the Irregulars wouldn´t always perform as expected.
On the picture above you can see a second US casualty occuring, shot from the far end of the compound. He was ultimately found seriously wounded and quickly tended to by the Medic.
Meanwhile, the firefight on the hill raged on, with a steady rate of Taliban casualties. Fortunately the Taliban weren´t able to mount a combined effort on the USMC team, both due to command and control issues and overwatch from the rest of the squad in the treeline.
The Taliban now moved another small cell into the compound to establish line of sight to the isolated fireteam, but again they were unable to cause casualties or suppress them for good to prepare a close assault by the remaining troops.
Another HMG-team turned up and was positioned on the right flank as well, ready to deliver some hefty firepower on the lone Fireteam.
Fortunately, the Taliban made a mistake by drawing in another leader from the left flank to prepare the ultimate destruction of the fireteam. Putting the leader in the direct line of fire of the USMC-team (and without much cover on the wall of the compound) proved to be fatal as the Marines took him down before he could coordinate anything.
At this point, the Taliban command was seriously strained, with only three leaders left they where running short on activations for all their units.
Furthermore, time was running out as the Taliban player had to leave and my departure was also drawing closer. We thus called it a game, and though it was a very balanced affair to this point my bets would have been with the Marines. On the other hand.. you never know, a few bad rolls and the Taliban might have succeded as well... hard to say
All in all, a very nice game. The Marines paid for their mistake to deploy into the compound, which essentially boxed them in. They also suffered from the IEDs blocking their way (or rather from our hesitation to put the men at risk by taking that route).
I threw together two lists from previous scenarios that we hadn´t pitted against each other in this combination, so we saw the USMC facing a horde of Local, irregular Taliban.
After setting up the table and rolling off the starting edges it became pretty obvious that the terrain favoured the Taliban to some degree.
The USMC had to secure and hold the compound, the Taliban just had to kill the Infidels.
As you can see, the USMC also screwed up the initial deployment somewhat by committing a whole squad to the central compound, which severely limited their movement options. The second squad was positioned much better on the right flank, covered by a treeline and with a good look over onto the rocky hills.
The approaches to the compound where littered with suspect devices which pretty much blocked the USMCs way on any direct route into their objective.
Due to the restricted approaches the Taliban where able to secure some key positions, including the compound in the first two turns which made it even harder for the americans to achieve their objectives. Instead they switched into the patience-mode and started picking off the Insurgents at range, killing Taliban at a steady rate.
The only problem was that Taliban where getting reinforcements and could compensate this to some degree as long as key personell (leaders) were still alive.
The US couldn´t reinforce their troops and any losses would bring them one step closer to defeat. Unfortunately, the first KIA on the american side occured in the early part of the game, one of the first firefights on the right flank took down a Marine for good.
To put up more pressure, the USMC sent a Fireteam forward on the right flank to occupy the hillside under cover from the rest of the squad and called in their Cobra Gunship to deliver a strafing run on top of a bunched up group of Taliban.
Unfortunately for the Marines the Taliban were not pinned down and able to move out of the way before the ordnance hit, so the strike was actually very ineffective but at least drove the Insurgents closer to the US.
Meanwhile the Taliban had turned up with a new shiny toy, a DShK-HMG that was being set up in a field before delivering a volley of 12,7mm fire into the house occupied by US Forces. Though no casualties were caused, the Team and the JTAC where easily pinned.
To counter the threat, the Cobra was again dialed to deliver a missile into the HMG-team and the nearby cell of fighters. Unfortunately clearance procedures and a bad attack vector of th helicopter after the last strafing run delayed the request significantly and would leave the US in contact for quite a few more turns.
So instead of being stuck in the compound the Marine commander decided to relocate one of the fireteams towards the right flank to reinforce the push onto the hill.
Meanwhile the firefight on the hill and the right side in general was raging on, with one single fireteam pitted against three groups of insurgents in a firefight on close range. In a heroic stand they held out for the entire game and reduced the Taliban groups one by one - fortunately the leadership on the right flank was somewhat weakened by the loss of a leader early on, so the Taliban couldn´t fight with full efficiency as the Irregulars wouldn´t always perform as expected.
On the picture above you can see a second US casualty occuring, shot from the far end of the compound. He was ultimately found seriously wounded and quickly tended to by the Medic.
Meanwhile, the firefight on the hill raged on, with a steady rate of Taliban casualties. Fortunately the Taliban weren´t able to mount a combined effort on the USMC team, both due to command and control issues and overwatch from the rest of the squad in the treeline.
The Taliban now moved another small cell into the compound to establish line of sight to the isolated fireteam, but again they were unable to cause casualties or suppress them for good to prepare a close assault by the remaining troops.
Another HMG-team turned up and was positioned on the right flank as well, ready to deliver some hefty firepower on the lone Fireteam.
Fortunately, the Taliban made a mistake by drawing in another leader from the left flank to prepare the ultimate destruction of the fireteam. Putting the leader in the direct line of fire of the USMC-team (and without much cover on the wall of the compound) proved to be fatal as the Marines took him down before he could coordinate anything.
At this point, the Taliban command was seriously strained, with only three leaders left they where running short on activations for all their units.
Furthermore, time was running out as the Taliban player had to leave and my departure was also drawing closer. We thus called it a game, and though it was a very balanced affair to this point my bets would have been with the Marines. On the other hand.. you never know, a few bad rolls and the Taliban might have succeded as well... hard to say
All in all, a very nice game. The Marines paid for their mistake to deploy into the compound, which essentially boxed them in. They also suffered from the IEDs blocking their way (or rather from our hesitation to put the men at risk by taking that route).
Saturday, November 15, 2014
Go West! - A Cold War Batrep
This is a short summary of the events that transpired during one of our two playtests today on a local convention.
We played a Cold War-Scenario pitting East German Forces against British Army of the Rhine.
The East Germans fielded a platoon of Motor Rifles with BMP-2 and some support assets:
The East Germans had to achieve breakthrough to threaten the defensive line of the company and lead the way for the next wave. To do this, they had to bring at least 3 teams towards the enemy table edge.
The game started with aggressive action of the BMPs, which unleashed their 30mm Cannons on Section 1 Riflegroup entrenched in their field fortifications. Unfortunately, the fire was less devastating than the East Germans had hoped...
The answer was relatively swift and within two turns, both BMPs exploded in balls of flames as the MAWs hit their target and pierced the APCs. The explosion of one of the BMPs also affected the dismounted infantry group next to them by killing their leader and causing some confusion in the worst possible moment.
Reduced to the infantry dismounts in the centre, the firefight quickly evolved into British target practise as the veteran troops slowly, turn by turn, chewed through the infantry groups.
Meanwhile the East germans started a last attempt on the right flank and managed to advance their tanks and a Motor Rifle group with the last BMP along the right side.
Due to a bad decision by the NVA platoon leadership (i.e. players) the infantry group was ordered into the British flank but ultimately failed to develop enough momentum to do any damage. The British just regrouped a few meters back, held them at a distance, pinned them down and slowly chewed through the group.
So while the BMP and the T55 had broken through, the three infantry groups were stuck in the firefight, pinned down and taking heavy casualties, unable to recover from the constant fire without further heavy support.
We thus surrendered and awarded victory to the capitalist defenders ;)
The reason for our failure was to commit the third infantry group into the attack on the flank while the center was already losing the firefight. If we had just pushed on to the table edge, we might have been able to draw away more British troops, disperse their units more and move the infantry off table under the cover of our vehicles.
Bad call - but a very nice game, showing that the system works in other settings just like intended, although with quite a different feeling to it. Unfortunately I forgot to take pictures for this battle. At least I remembered to take pics of the second scenario which will be covered another time!
We played a Cold War-Scenario pitting East German Forces against British Army of the Rhine.
The East Germans fielded a platoon of Motor Rifles with BMP-2 and some support assets:
- 3x Mot. Rifle Group + BMP-2
- 1x T55
- 1x Platoon Lead + Forward Observer
- Heavy Mortar Battery on call
- 2x Infantry Section (Veteran) including a Carl Gustav in each time as usual
- 1x Platoon Lead + Forward Observer
- Light Howitzer Fire Support on call
The East Germans had to achieve breakthrough to threaten the defensive line of the company and lead the way for the next wave. To do this, they had to bring at least 3 teams towards the enemy table edge.
The game started with aggressive action of the BMPs, which unleashed their 30mm Cannons on Section 1 Riflegroup entrenched in their field fortifications. Unfortunately, the fire was less devastating than the East Germans had hoped...
The answer was relatively swift and within two turns, both BMPs exploded in balls of flames as the MAWs hit their target and pierced the APCs. The explosion of one of the BMPs also affected the dismounted infantry group next to them by killing their leader and causing some confusion in the worst possible moment.
Reduced to the infantry dismounts in the centre, the firefight quickly evolved into British target practise as the veteran troops slowly, turn by turn, chewed through the infantry groups.
Meanwhile the East germans started a last attempt on the right flank and managed to advance their tanks and a Motor Rifle group with the last BMP along the right side.
Due to a bad decision by the NVA platoon leadership (i.e. players) the infantry group was ordered into the British flank but ultimately failed to develop enough momentum to do any damage. The British just regrouped a few meters back, held them at a distance, pinned them down and slowly chewed through the group.
So while the BMP and the T55 had broken through, the three infantry groups were stuck in the firefight, pinned down and taking heavy casualties, unable to recover from the constant fire without further heavy support.
We thus surrendered and awarded victory to the capitalist defenders ;)
The reason for our failure was to commit the third infantry group into the attack on the flank while the center was already losing the firefight. If we had just pushed on to the table edge, we might have been able to draw away more British troops, disperse their units more and move the infantry off table under the cover of our vehicles.
Bad call - but a very nice game, showing that the system works in other settings just like intended, although with quite a different feeling to it. Unfortunately I forgot to take pictures for this battle. At least I remembered to take pics of the second scenario which will be covered another time!
Monday, October 27, 2014
Hunting Abu al Kabris - A mini-Batrep
Last saturday we had another demo-battle for our new modern warfare rules, so I´m giving you a very very condensed version of the events that transpired.
I brought to lists, pitching USMC with Cobra Air Support against a mixed bag of Insurgents, featuring Hardcore Foreign Fighters (the best of the best), regular Taliban and a small group of Local Militia hired to support the hardened troops.
The task at hand was to hunt down and kill Abu al Kabris, a high ranking leader in the Insurgent hierarchy who was believed to have a safehouse in a small industrial complex in the mountains.
The Insurgents started the game by rolling an extraordinary success on their command roll, which enabled them to move the HVT into the central industrial complex closer to their troops. Even after doing that they had enough activations left to bring their troops into position and cover the road.
The USMC moved in slowly, covered the hills on the north-eastern part of the battlefield which overlooked a good part of the map.
Soon, a firefight erupted on the eastern flank as US Marines moved in, surprising the PKM-Team that where in an exposed position without cover.
The American killed three of four Taliban, the return fire caused a single casualty on the American side who turned out to be lightly wounded.
After seeing three of his mates go down the PKM-gunner decided to retreat into the nearby bushes but got shot during his retreat and didn´t get up again...
The nearby RPG-Team then unleashed a volley, scored a direct hit on an American Fireteam and caused two more casualties, one of which was a serious wound.
The US answer was swift, a fireteam unleashed hell on the RPG-team, the Forward Air Controller called in support from the Cobra Helicopter and though the request was successful, the strike would be delayed due to the RoE and Clearing procedures, giving the Taliban enough time to evacuate the position.
However, the infantry fire did kill most of the cell before the Taliban moved away.
The Taliban then consolidated their groups on the eastern flank and moved towards the buildings to avoid (or at least delay) further Airstrikes, leaving the left US flank relatively open.
Instead, they focussed on defending the western flank and tried to call in more reinforcements, who arrived in the form of two small cells in the back area of the US. One of those was quickly spotted and dispatched before they could mount a devastating rear attack from their ambush position, but the other team appearing out of a compound forced the US Marine players to divert a full Fireteam to guard the exit of the compound.
The game was finally decided when the US Marines tried to push on the right flank and ran into very determined resistance from a Syrian LMG-Team and an Afghan RPG-Team of Hardcore Taliban. Though the US where able to deal with the Afghan Team and initially pinned down the Syrians, they soon found themselves under a barrage of RPK-fire.
The final, incredibly lucky series of rolls was the US attacking the Syrian LMG team, firing first with four firepower successes. All four where saved by the Syrians, who counter-attacked with 5 Firepower dice, rolling ALL successes and had the US blundering by failing ALL 5 saving rolls against a 4+
Three KIA where the result, bringing the Taliban up the Taliban victory score close to auto-win. They now needed to roll a 2+ to win the game (trying once each turn) and thus we had a Taliban victory, as the US where far from killing the HVT.
Decisive Taliban Victory!
Everyone had great fun and loved the game, so I´m looking forward to playing some more demo-games, we seem to be on the right track. Some small balancing tweaks and finishing the writeup on the basic rules and we can enter the public playtesting stage!
I brought to lists, pitching USMC with Cobra Air Support against a mixed bag of Insurgents, featuring Hardcore Foreign Fighters (the best of the best), regular Taliban and a small group of Local Militia hired to support the hardened troops.
The task at hand was to hunt down and kill Abu al Kabris, a high ranking leader in the Insurgent hierarchy who was believed to have a safehouse in a small industrial complex in the mountains.
![]() |
| The Target: Abu al Kabris |
![]() |
| The Battleground |
The USMC moved in slowly, covered the hills on the north-eastern part of the battlefield which overlooked a good part of the map.
Soon, a firefight erupted on the eastern flank as US Marines moved in, surprising the PKM-Team that where in an exposed position without cover.
The American killed three of four Taliban, the return fire caused a single casualty on the American side who turned out to be lightly wounded.
After seeing three of his mates go down the PKM-gunner decided to retreat into the nearby bushes but got shot during his retreat and didn´t get up again...
The nearby RPG-Team then unleashed a volley, scored a direct hit on an American Fireteam and caused two more casualties, one of which was a serious wound.
The US answer was swift, a fireteam unleashed hell on the RPG-team, the Forward Air Controller called in support from the Cobra Helicopter and though the request was successful, the strike would be delayed due to the RoE and Clearing procedures, giving the Taliban enough time to evacuate the position.
However, the infantry fire did kill most of the cell before the Taliban moved away.
The Taliban then consolidated their groups on the eastern flank and moved towards the buildings to avoid (or at least delay) further Airstrikes, leaving the left US flank relatively open.
Instead, they focussed on defending the western flank and tried to call in more reinforcements, who arrived in the form of two small cells in the back area of the US. One of those was quickly spotted and dispatched before they could mount a devastating rear attack from their ambush position, but the other team appearing out of a compound forced the US Marine players to divert a full Fireteam to guard the exit of the compound.
The game was finally decided when the US Marines tried to push on the right flank and ran into very determined resistance from a Syrian LMG-Team and an Afghan RPG-Team of Hardcore Taliban. Though the US where able to deal with the Afghan Team and initially pinned down the Syrians, they soon found themselves under a barrage of RPK-fire.
![]() |
| The Syrian LMG Team - the Game Changer |
The final, incredibly lucky series of rolls was the US attacking the Syrian LMG team, firing first with four firepower successes. All four where saved by the Syrians, who counter-attacked with 5 Firepower dice, rolling ALL successes and had the US blundering by failing ALL 5 saving rolls against a 4+
Three KIA where the result, bringing the Taliban up the Taliban victory score close to auto-win. They now needed to roll a 2+ to win the game (trying once each turn) and thus we had a Taliban victory, as the US where far from killing the HVT.
Decisive Taliban Victory!
Everyone had great fun and loved the game, so I´m looking forward to playing some more demo-games, we seem to be on the right track. Some small balancing tweaks and finishing the writeup on the basic rules and we can enter the public playtesting stage!
Subscribe to:
Posts (Atom)